Step by Step How to Rename Domain Name in Windows Server 2016
You can use the domain rename process to change the names of your domains, and you can also use it to change the structure of the domain trees in your forest. This process involves updating the Domain Name System (DNS) and trust infrastructures as well as Group Policy and service principal names (SPNs).
The ability to rename domains provides you with the flexibility to make important name changes and forest structural changes as the needs of your organization change. Using domain rename, you cannot only change the name of a domain, but you can change the structure of the domain hierarchy and change the parent of a domain or move a domain residing in one domain tree to another domain tree. The domain rename process can accommodate scenarios involving acquisitions, mergers, or name changes in your organization, but it is not designed to accommodate forest mergers or the movement of domains between forests.
Note:
Domain rename is intended to be a supported method for renaming domains when domain renames are necessary; it is not intended to make domain rename a routine operation.The domain rename process is complex, and it requires a great deal of care in planning and execution. In addition, the time that is required for a complete domain rename operation is directly proportional to the size of an Active Directory forest in terms of its number of domains, domain controllers, and member computers. Therefore, although domain rename is possible, it should not be undertaken lightly.The domain rename operation is not supported in Microsoft Exchange Server 2007 or Exchange Server 2010. DNS domain rename is supported in Exchange Server 2003. However, renaming of the NetBIOS domain name is not supported in any version of Exchange Server. Other non-Microsoft applications might also not support domain rename.
For this time easy Guide, I will show you all how to rename domain name in Windows Server 2016, the process is straightforward. but as usual. backup any necessary information and Server before you proceed & I always advice, please do this exercises in LAB Environment (Hyper-V). Don’t simply take any risk by doing this is production environment unless you have to. 😦
The existing domain is Windows.ae and I will rename it to Sifad.local
So, let get started.
1 – Open your System Properties and check your existing domain name, if you see from my Windows Server 2016 system properties, my existing domain name is Windows.ae. This will be change to Sifad.local in the short while.

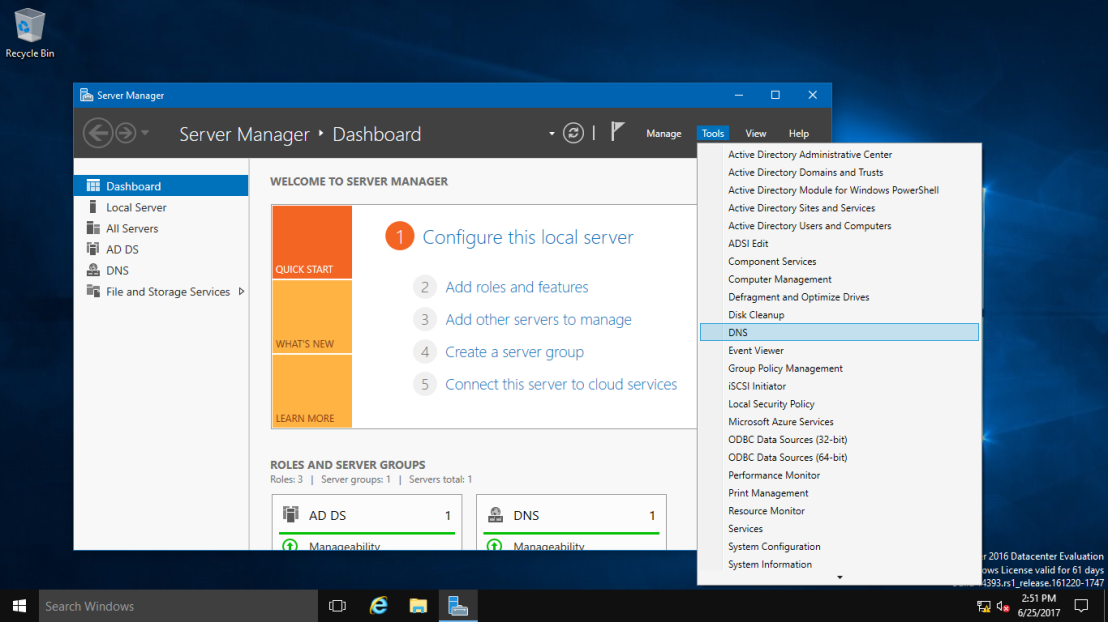
2 – Next, open your Server Dashboard, go to Tools & click DNS to open DNS Manager.
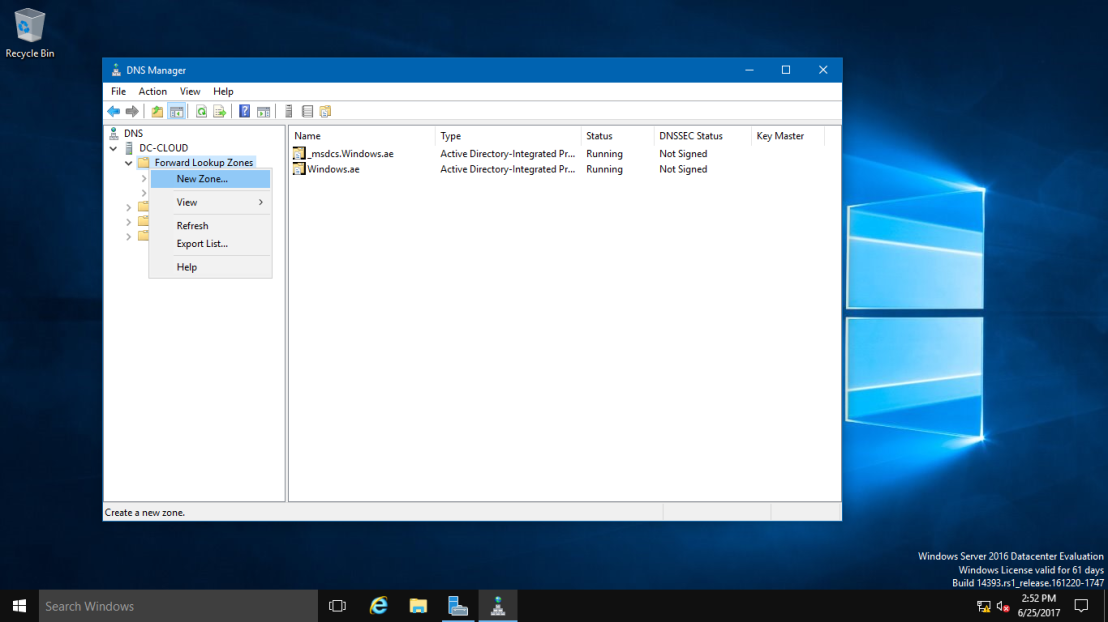
3 – on the DNS Manager, you must create the New DNS Zone (Sifad.local), this is to make sure that after whole process successfully, your member server and Windows clients can join to new Domain name.
To create new DNS Zone, Right Click Forward Lookup Zone, and click New Zone
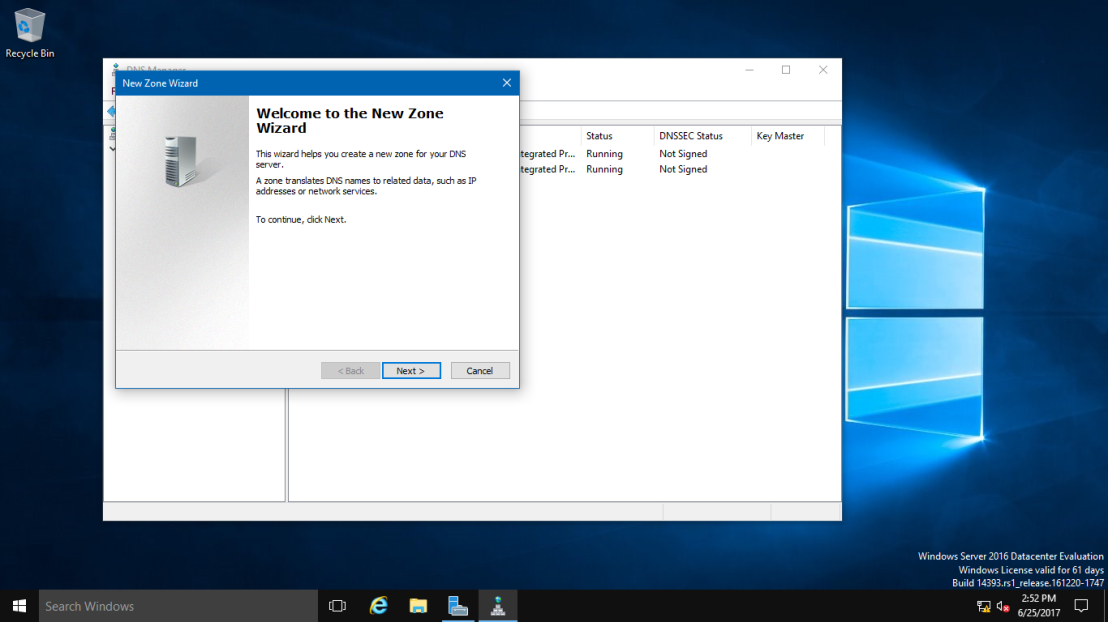
4 – On the Welcome to the New Zone Wizard, just click Next button.
5 – On the Zone Type, Click Primary Zone and click Next.

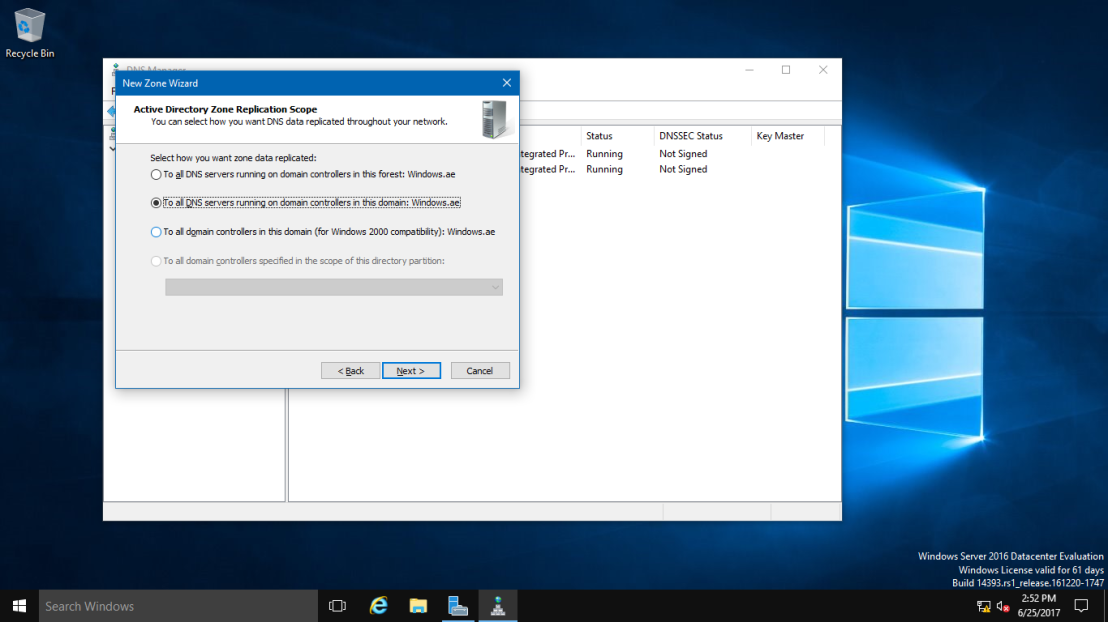
6 – On the Active Directory Zone Replication Scope, click button To all DNS servers running on domain controllers in this domain: Windows.ae and click Next.
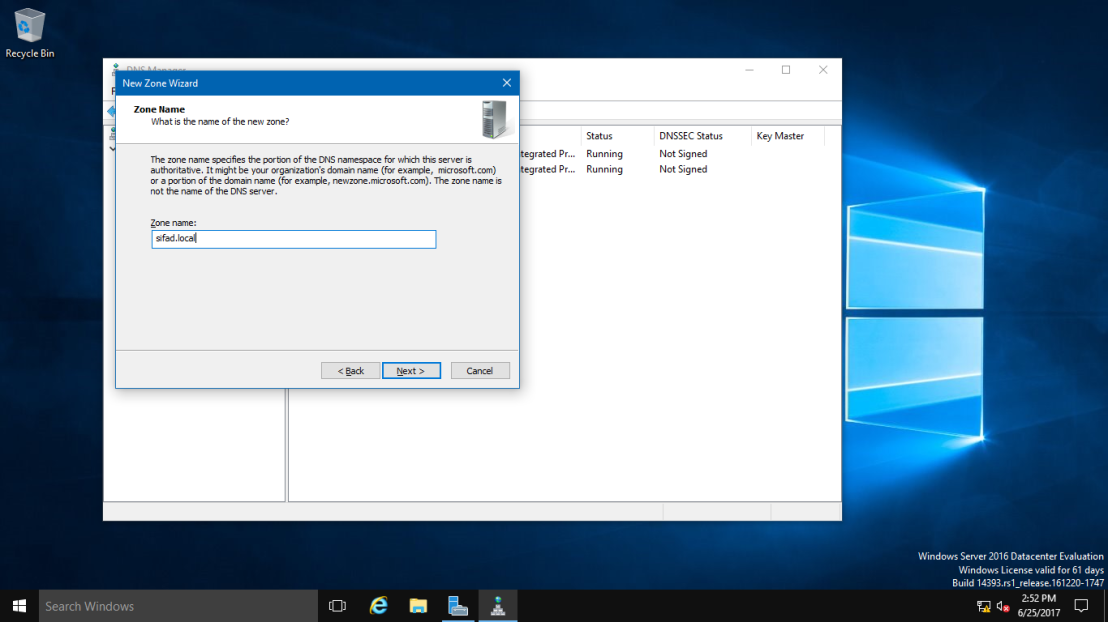
7 – In the Zone Name, key in your New Domain Name, my new Domain Name is Sifad.local.
8 – On the Dynamic Update, Click Allow only secure dynamic updates (recommended for Active Directory), and click Next.

9 – On the completing the New Zone Wizard, click Finish to complete the process.

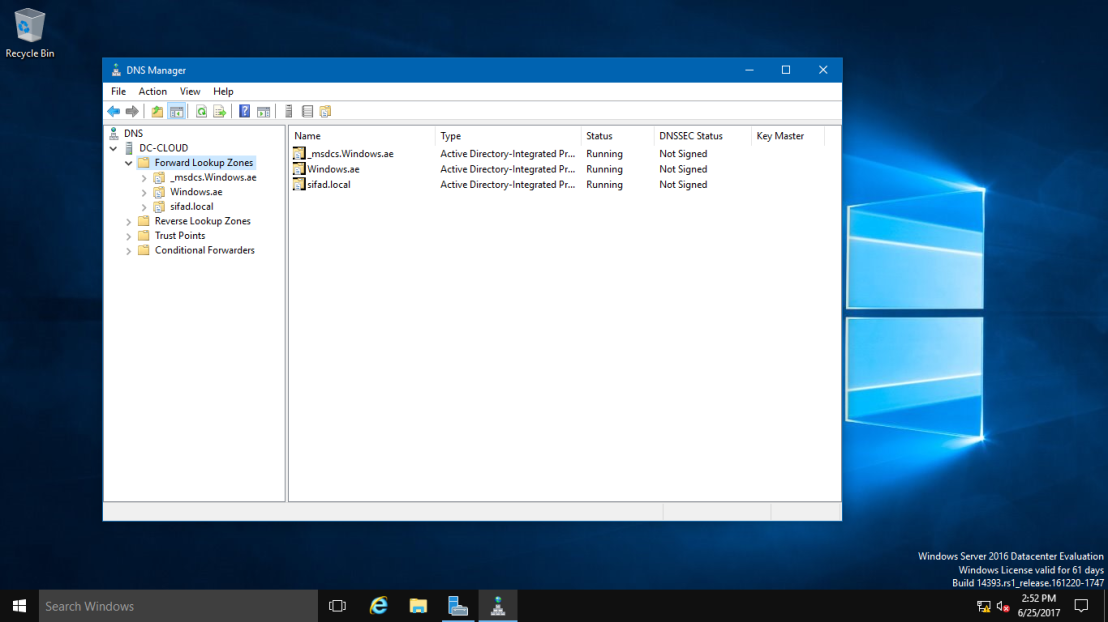
10 – On DNS Manager, you can see my new Domain Name is listed (sifad.local).
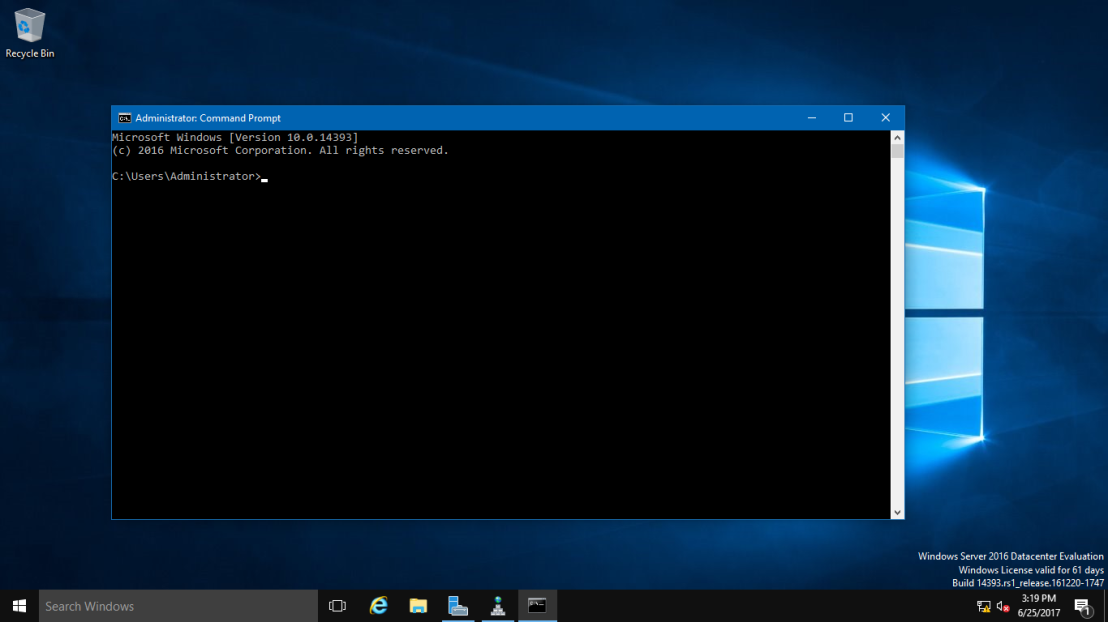
11 – Next, open Command Prompt, run as administrator.
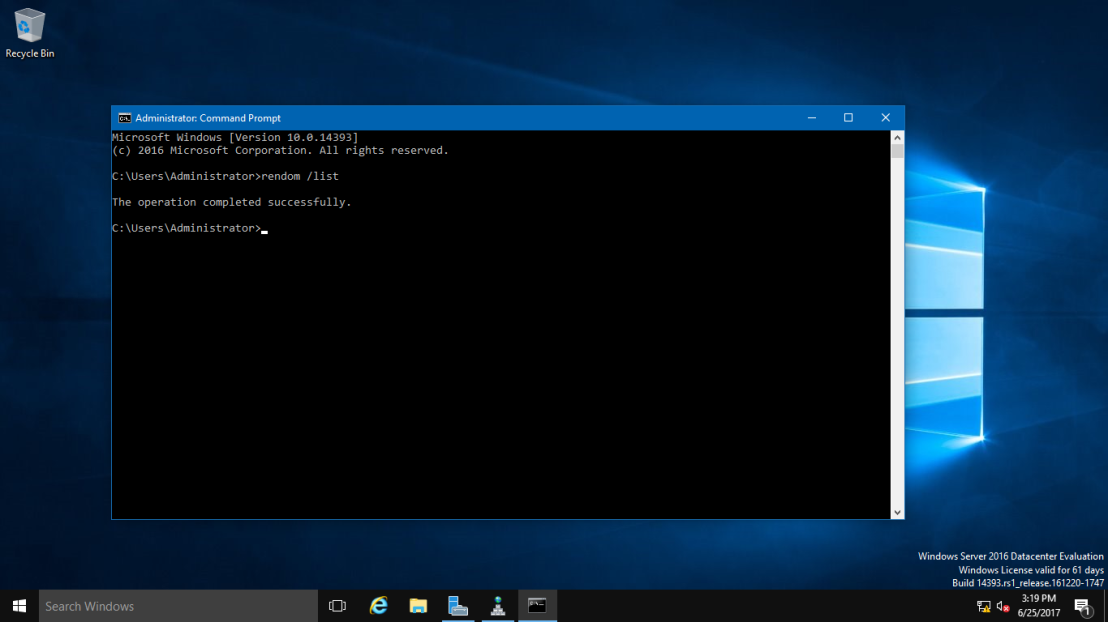
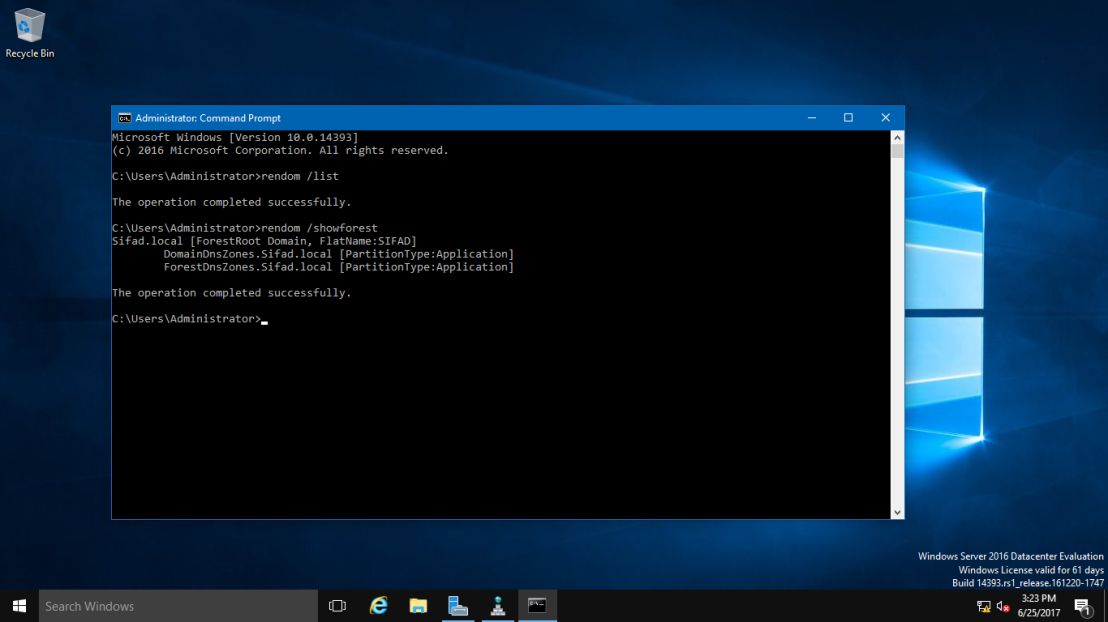
12 – In CMD, type rendom /list and press enter – this command use to generate a state file named Domainlist.xml. This file contains the current forest configuration.
13 – Next, open computer and browse to C:\Users\Administrator folder to get your Domainlist.xml.
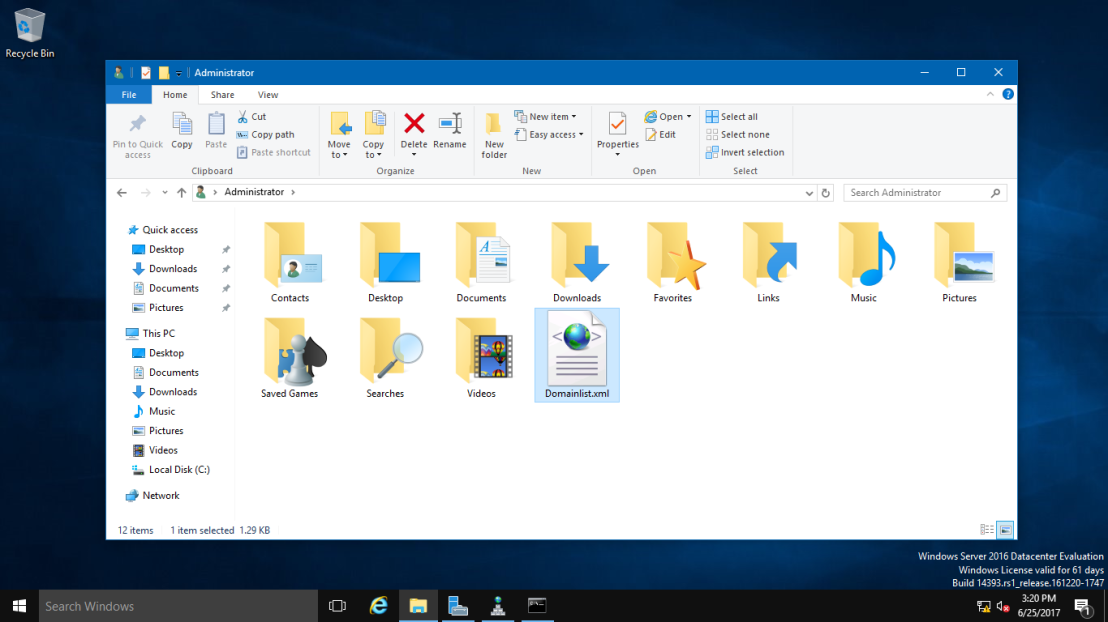
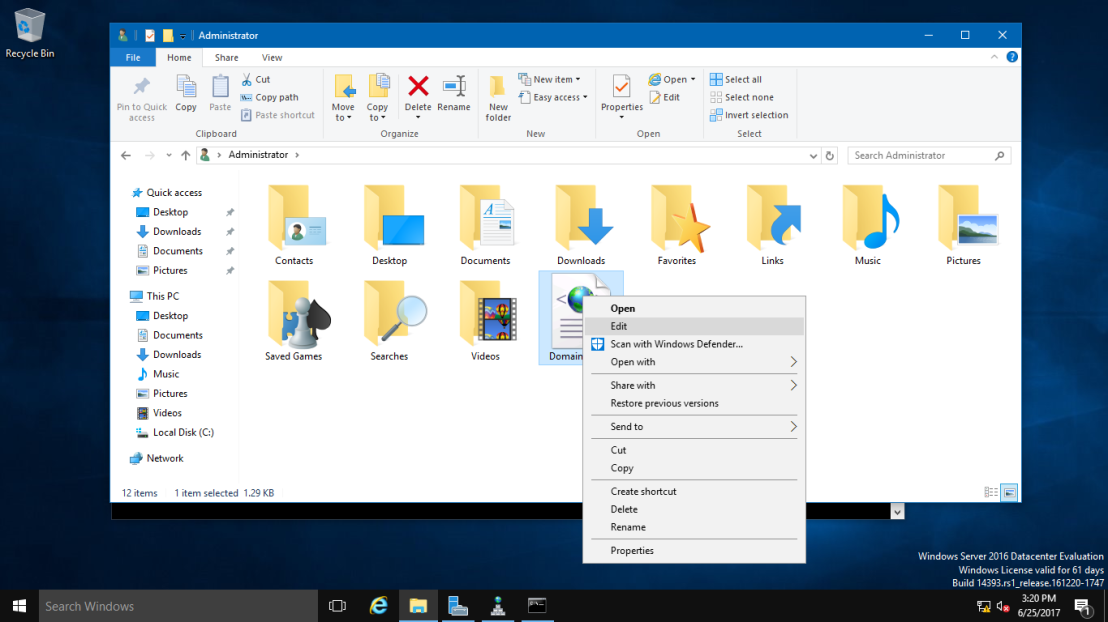
14 – Once you see the Domainlist.xml, right click the file name & choose Edit. I going to change the DNSname and NetBiosName in this Domainlist.xml file.
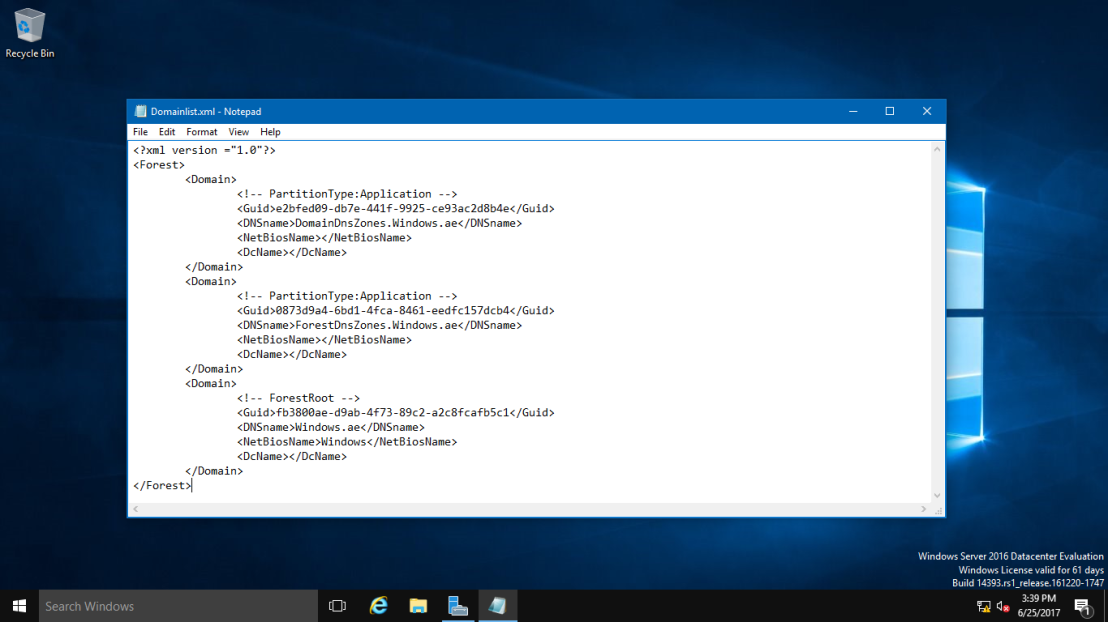
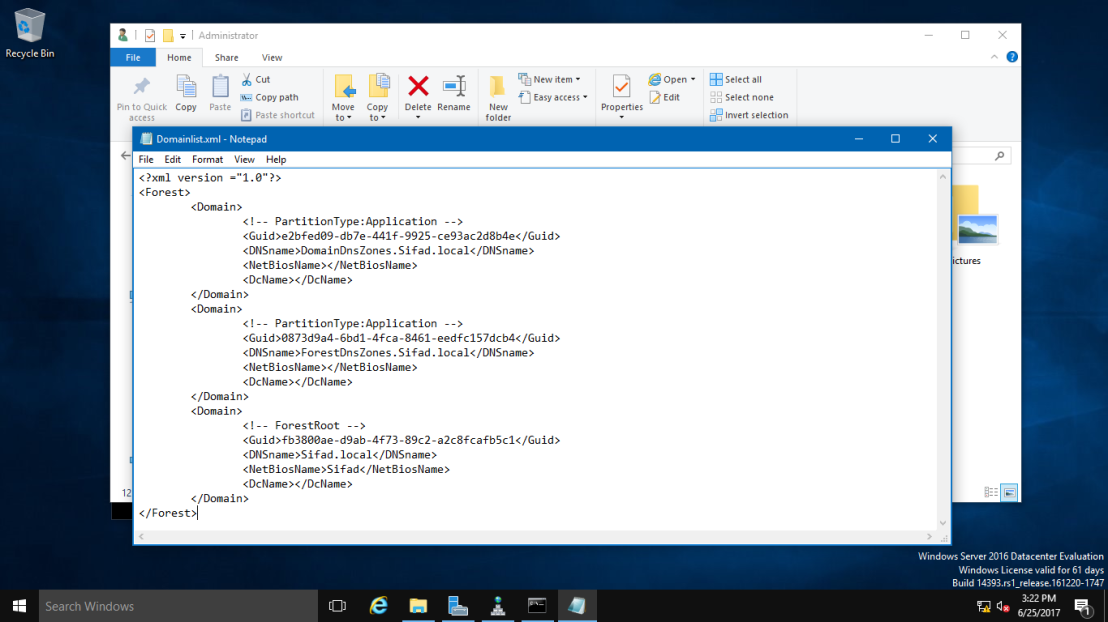
15 – Once the Domainlist.xml open, you can see there are few existing Domain name, change this existing domain name to new domain name. (Refer to picture)
16 – once you change to new Domain name, make sure you save the Domainlist.xml file.
17 – After you save the Domainlist.xml file, On the CMD, type rendom /showforest. This is to show the potential changes; this step does not make any changes.
18 – Next, type rendom /upload. This is to upload the rename instructions (Domainlist.xml) to the configuration directory partition on the domain controller holding the domain naming operations master role.

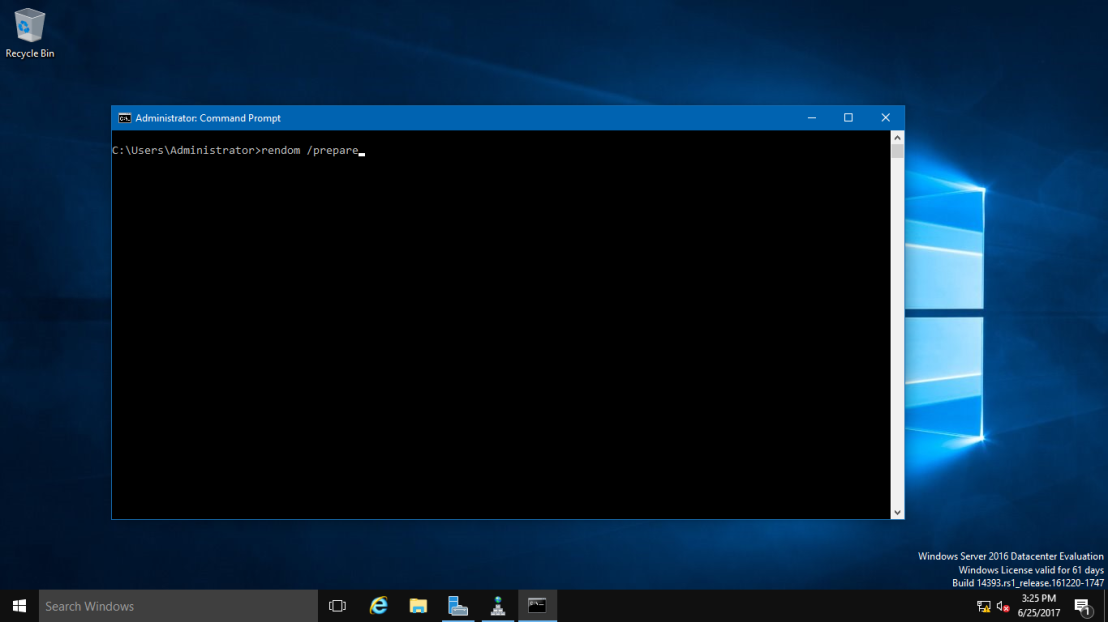
19 – Next, type rendom /prepare. This use to verify the readiness of each DC in the forest to carry out the rename instructions. This should contact all DC’s successfully and return no errors before proceed to next process.
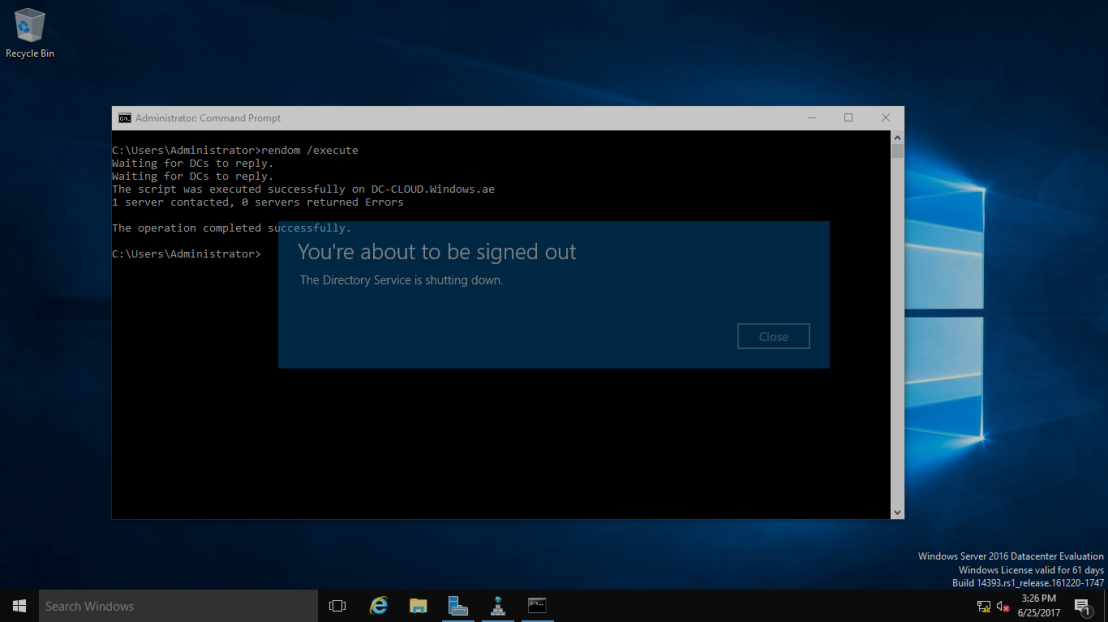
20 – Next, type rendom /execute. This is to verifies readiness of all DC’s and then preforms the rename action on each one.
“Remember also there will be a service interruption during this process. Once the process successful, your DC Server will be restarted.”
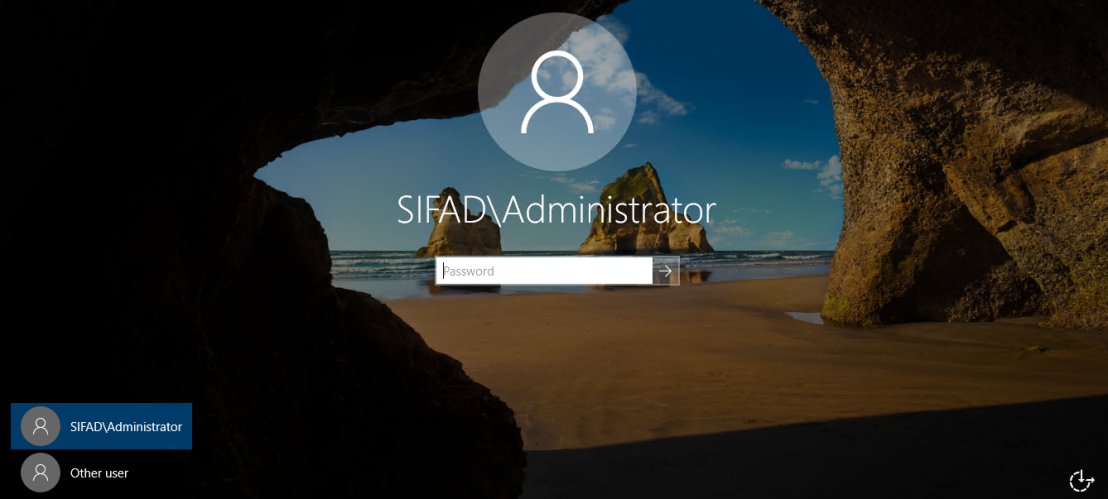
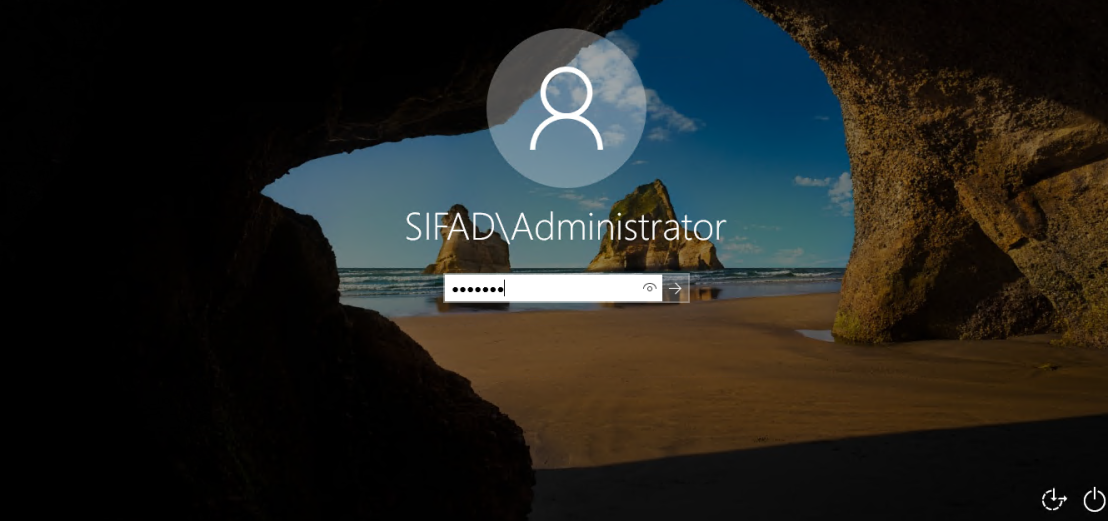
21 – Once your DC Server restarted, log in using the new Domain name as Administrator.
22 – Next, after you successfully log in, open System Properties and check your old Domain Name is now gone. Replace by new Domain name.

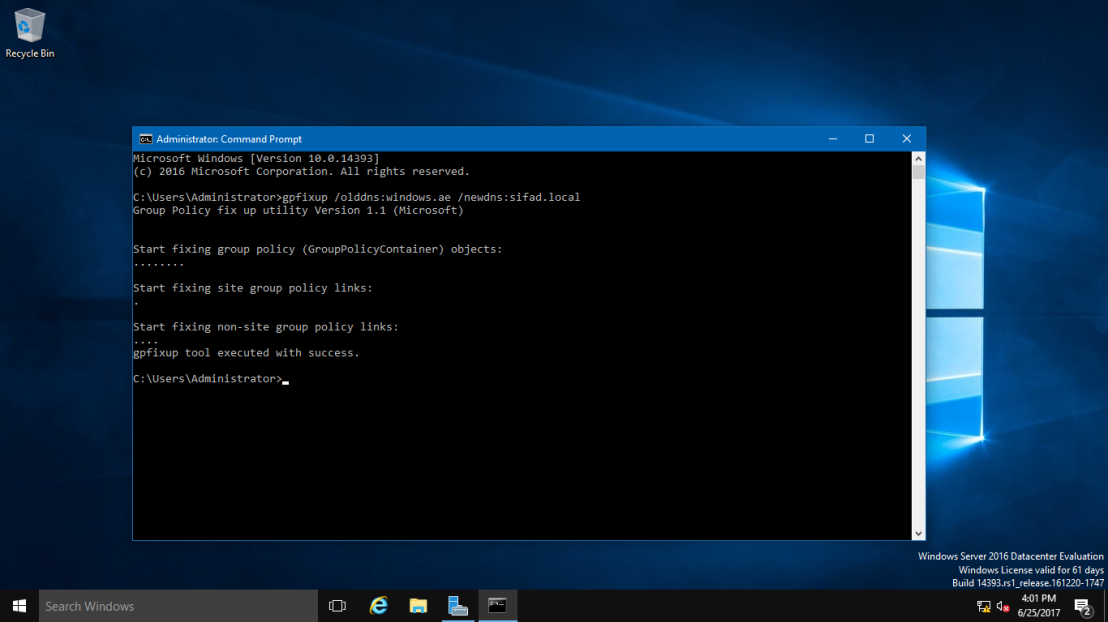
23 – Next, open CMD again, and type gpfixup /olddns:windows.ae /newdns:sifad.local This is to refresh all intra Domain references and links to group policy objects.
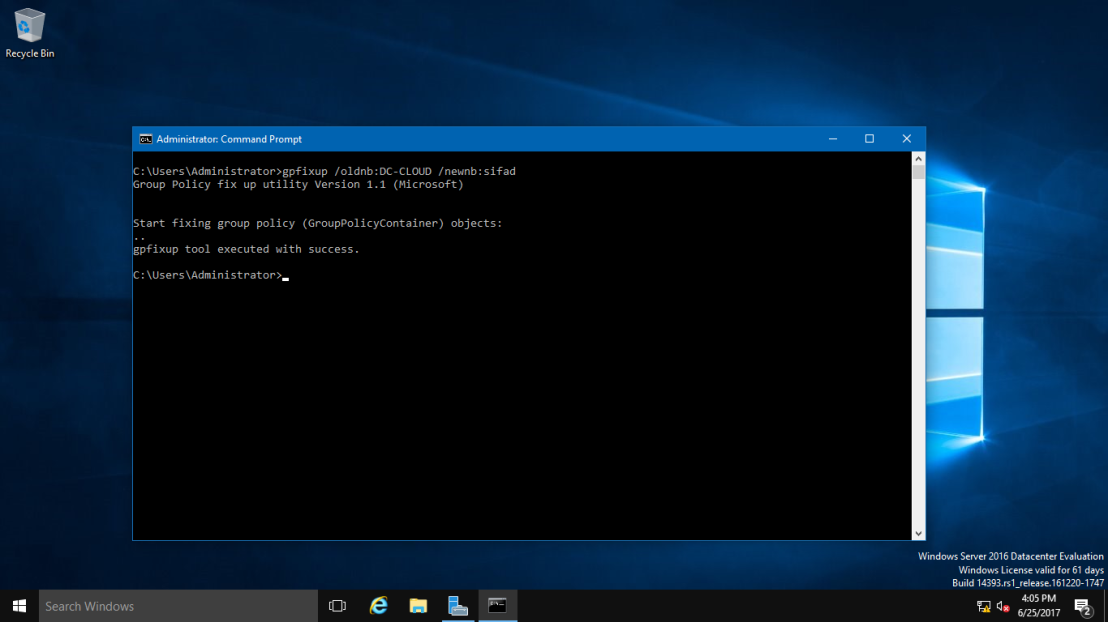
24 – Next, type gpfixup /oldnb:DC-CLOUD /newnb:sifad.
25 – Next, type rendom /clean. This is to remove references of the old domain name from AD.

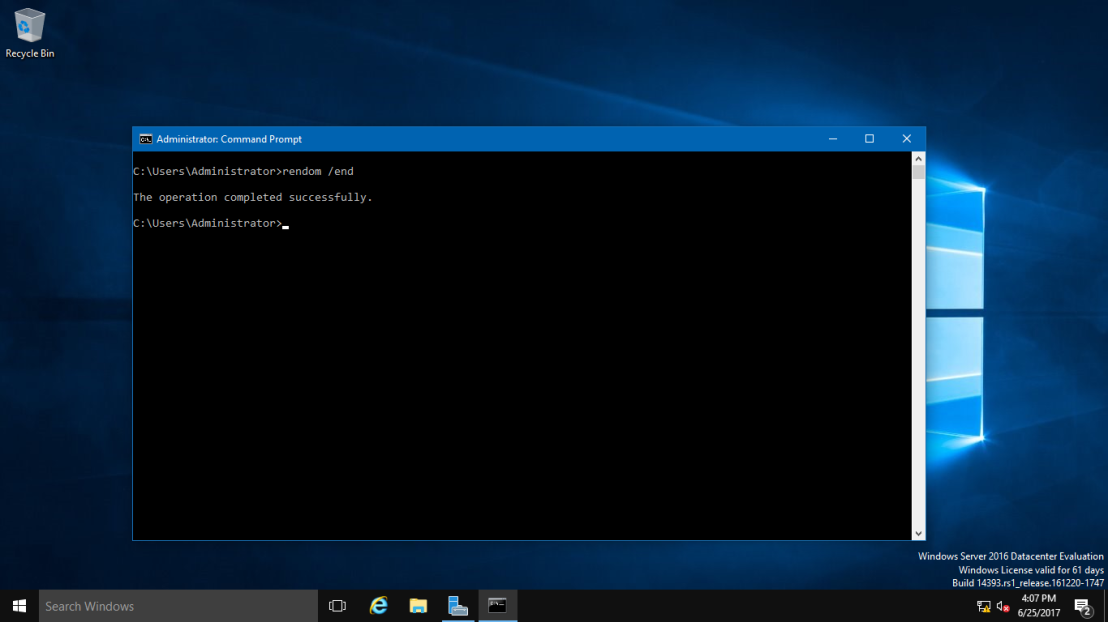
26 – Next, type rendom /end. This is to unfreeze the forest configuration and allow further changes. This was frozen during the rendom /upload step.
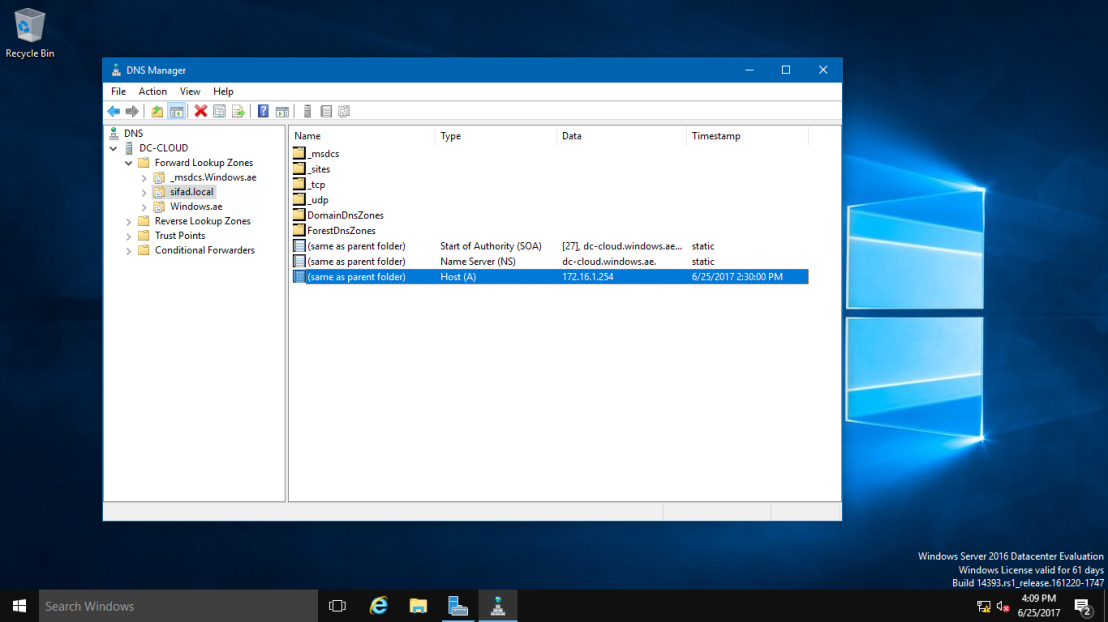
27 – Next, Open DNS Manager, click your new created domain (Sifad.local), here you can see your own IP listed but we still have long way to go to make sure this DNS Zone is working.
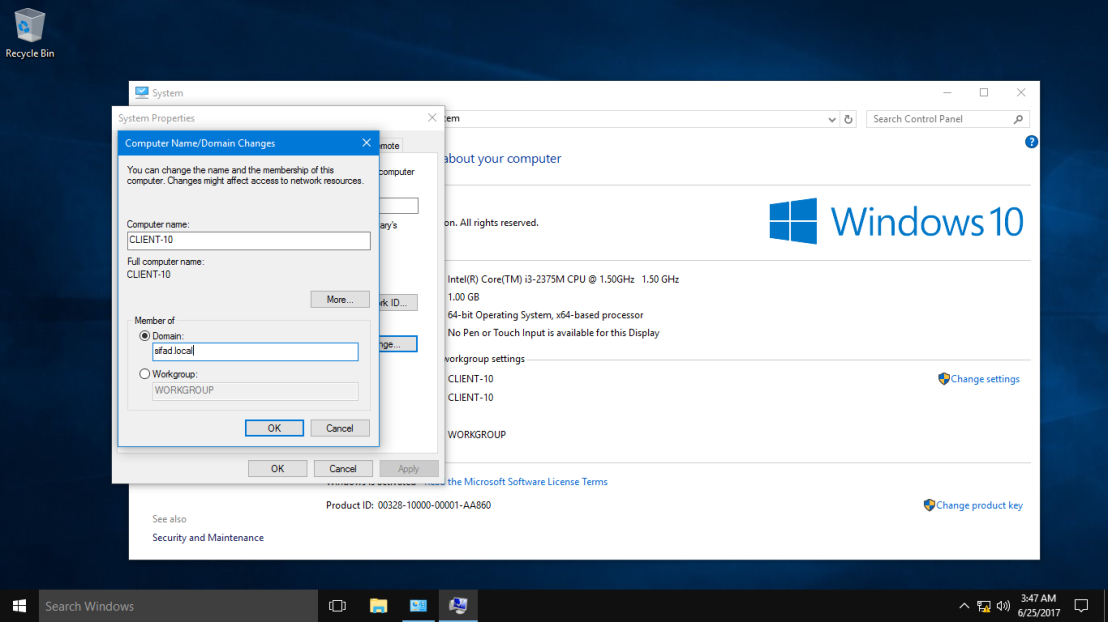
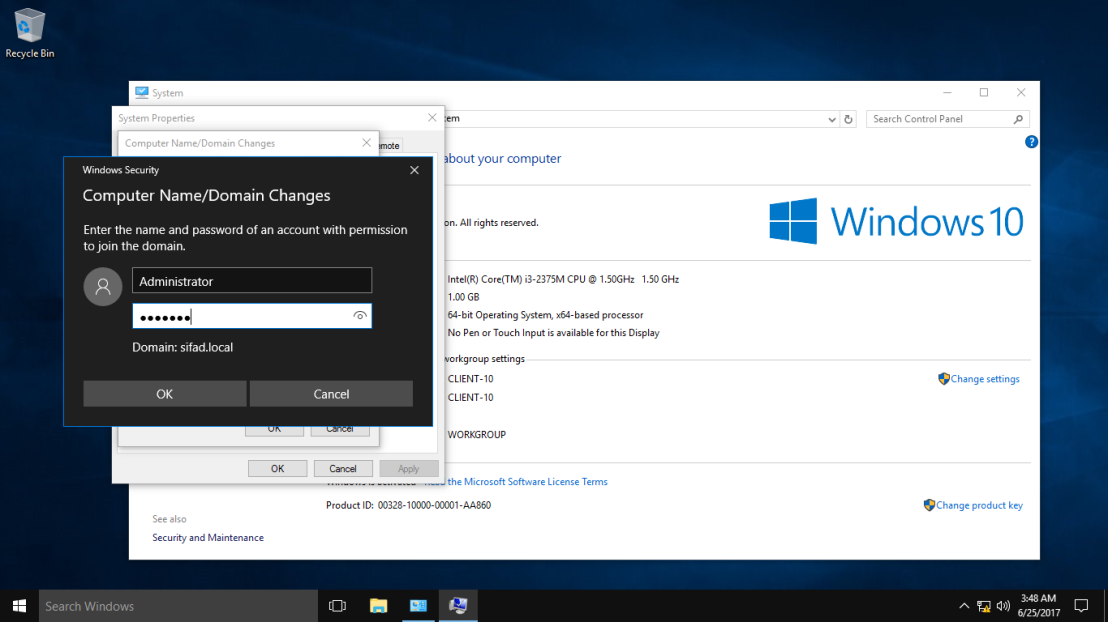
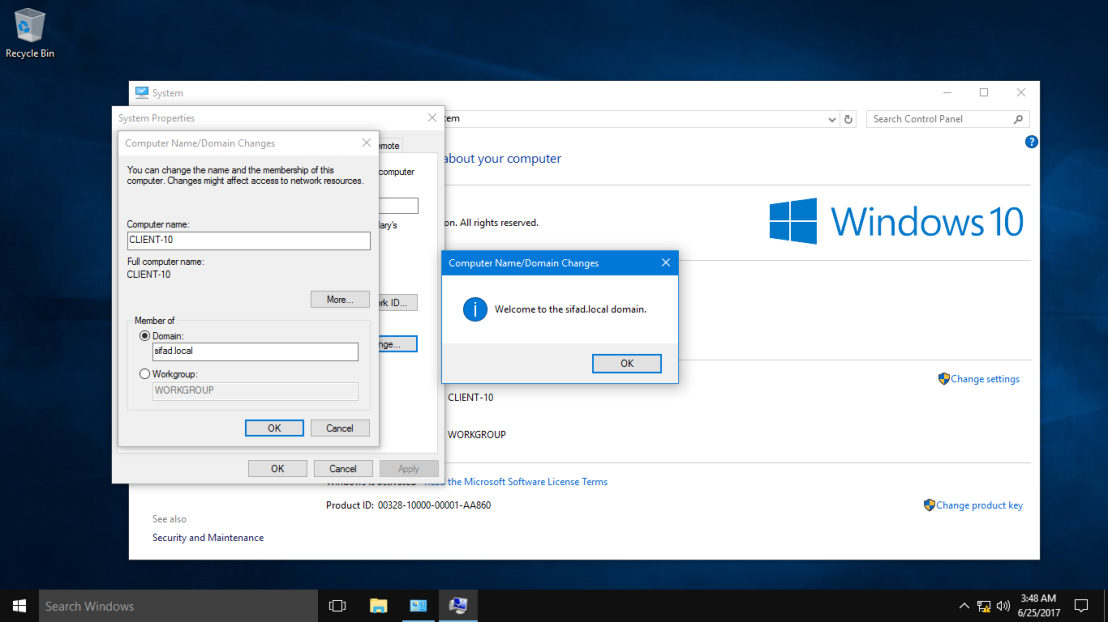
28 – Next, turn on your client PC, for this exercise I’m using Windows 10 as a client. Open System Properties and join to new Domain (sifad.local). Windows Security box will show up and now key in administrator and domain password and click OK (Welcome to the sifad.local domain). (Refer pictures)
29 – After your Windows 10 restart, log in as a domain administrator.
30 – Once you log in, double check Windows 10 System Properties. Now your Windows 10 successfully join in to new Domain (Sifad.local).
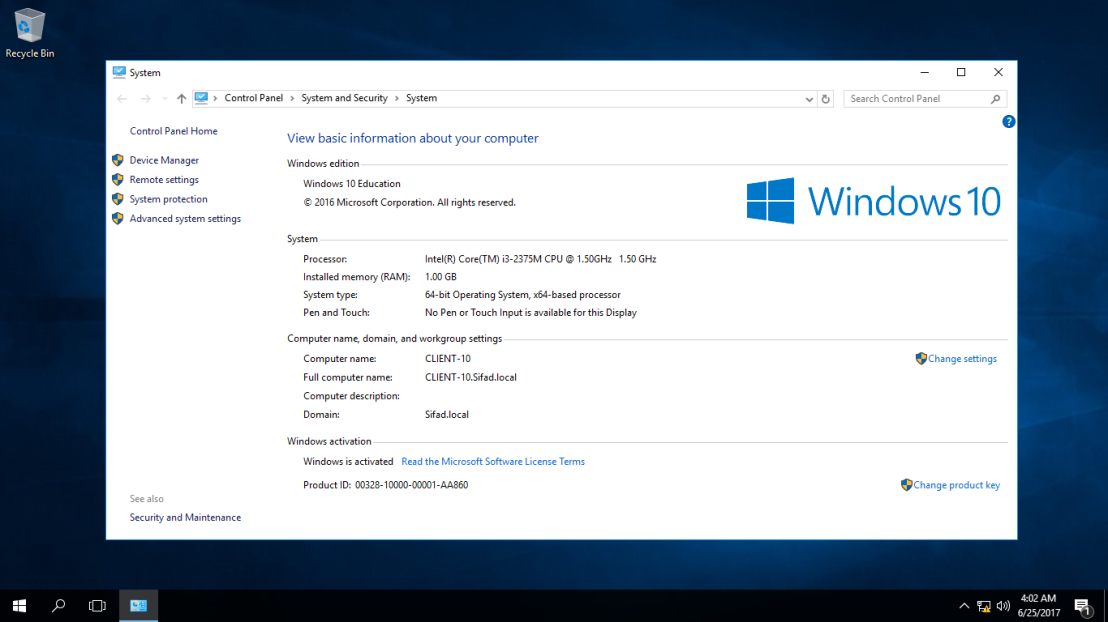
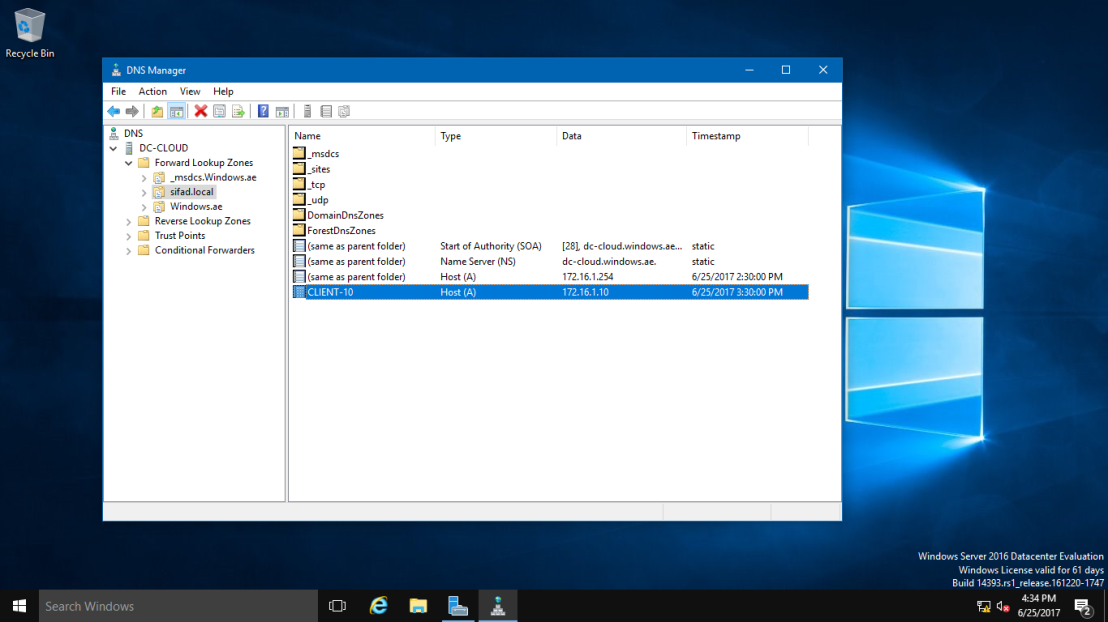
31 – Now, go to the Server 2016 and open DNS Manager, you can see now your Windows 10 Client is listed in DNS.
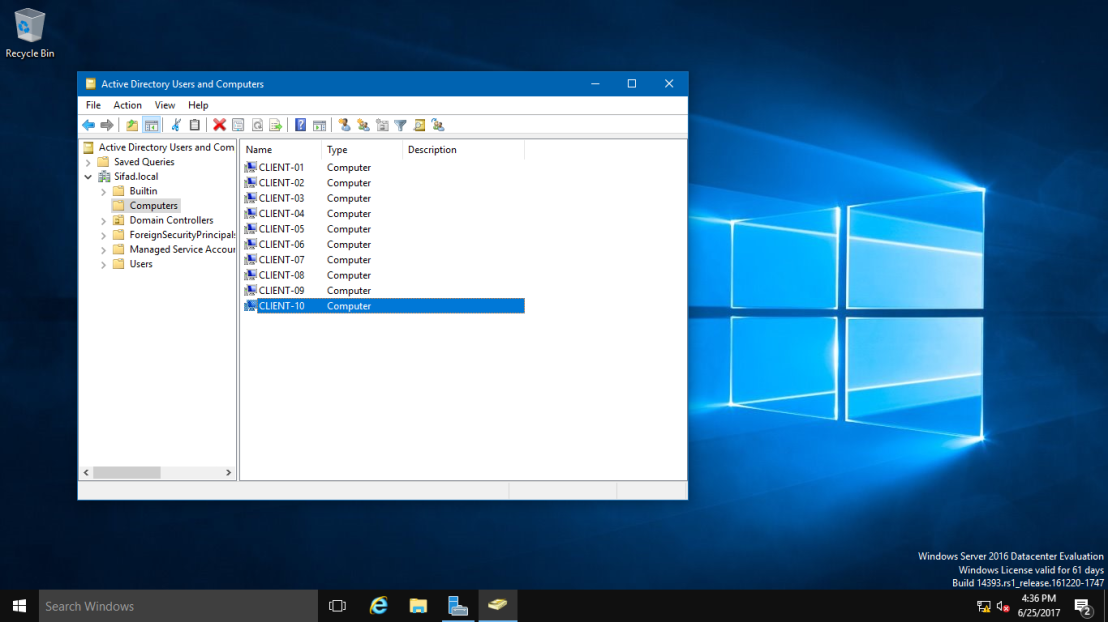
32 – You can also check in Active Directory Users & Computers that your Windows 10 Client now also listed.
This ends the rename process and we have a dc now with a new domain name.
No comments to display
No comments to display