If the recovery partition is not disabled, run this command to disable it.
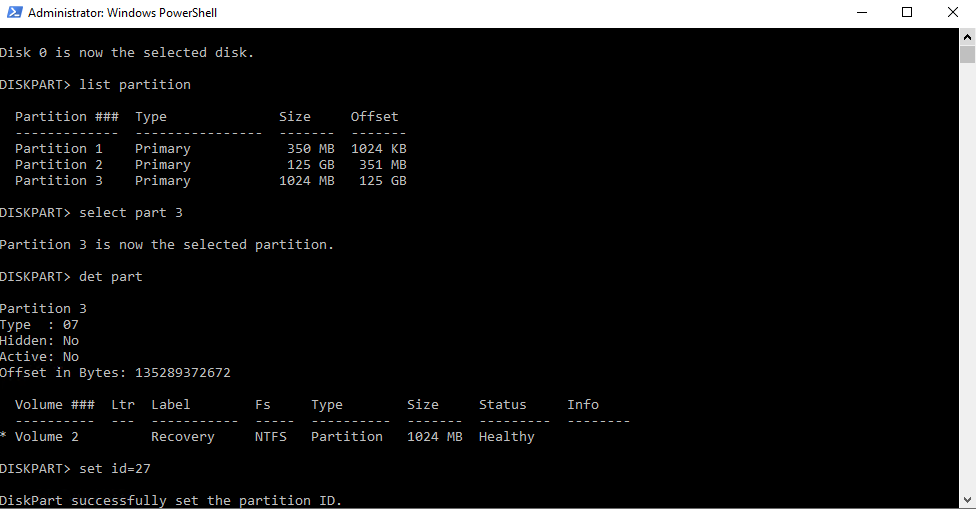
```powershell reagentc /disable ``` 4. Using Disk Manager, choose and shrink the existing Windows partition to create space for the new recovery partition. [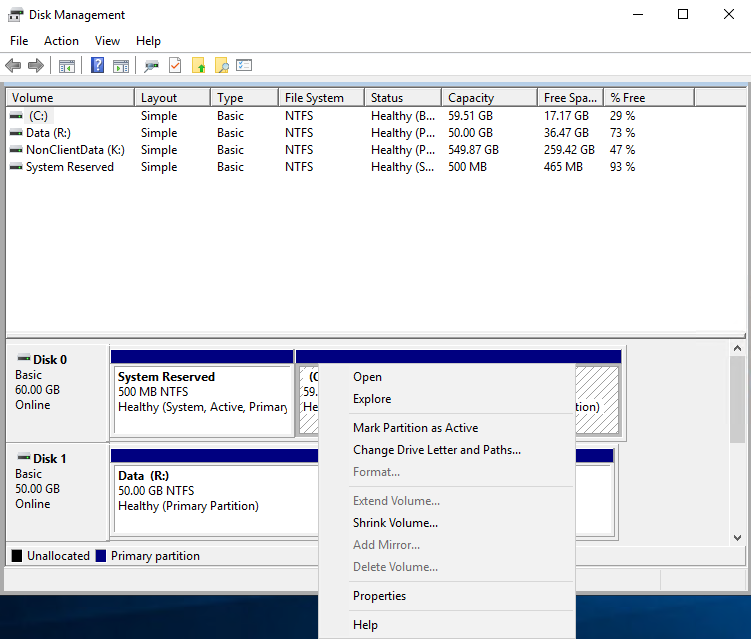](https://wikipedia.mutschlerhome.com/uploads/images/gallery/2024-04/utXhldoK9LOHJ5j0-image.png) 5. In the **`Shrink`** options, in the "`Enter the amount of space to shrink in MB:`" field, enter 1024 and click **`Shrink`**. [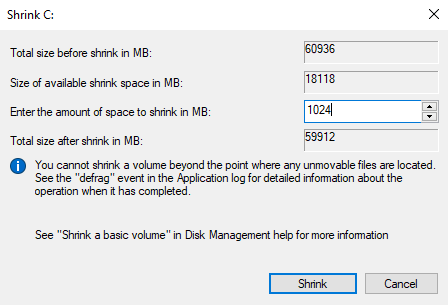](https://wikipedia.mutschlerhome.com/uploads/images/gallery/2024-04/7LQqLaBs4QYKI1NE-image.png) 6. Once there is now enough space on the C drive to create a recovery partition, open an admin command prompt and enter. ```powershell diskpart ``` [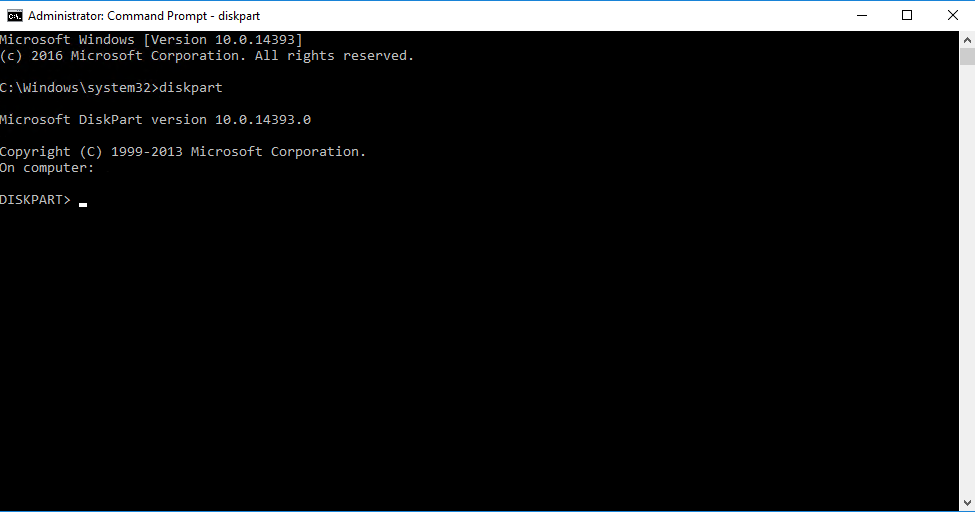](https://wikipedia.mutschlerhome.com/uploads/images/gallery/2024-04/2hOfk2eqInHSVC1G-image.png) 7. List the disks within diskpart by typing the following command. ```powershell list disk ``` [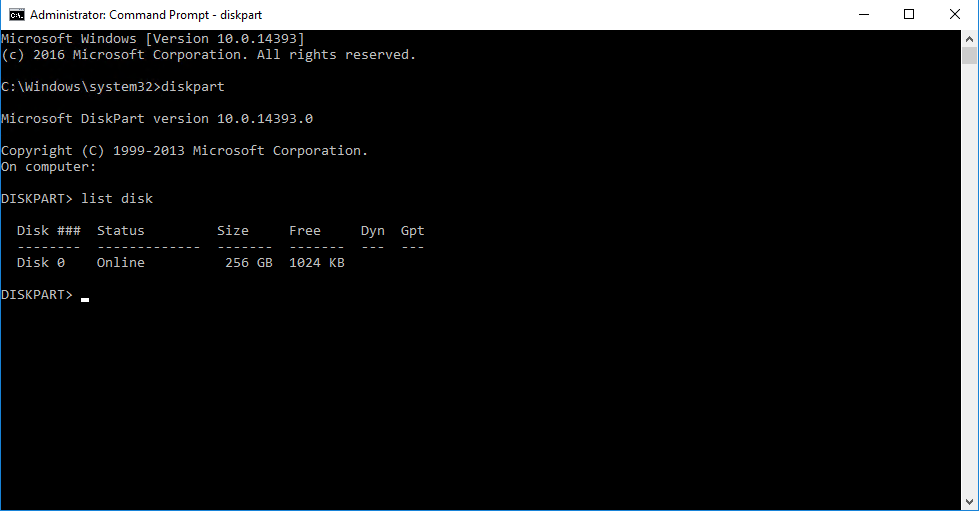](https://wikipedia.mutschlerhome.com/uploads/images/gallery/2024-04/W8TSW0M9bcNz7Clk-image.png) 8. Select the disk that you edited the partition for in step 5 using the following command (replace the number with the correct disk). ```powershell select disk 0 ``` [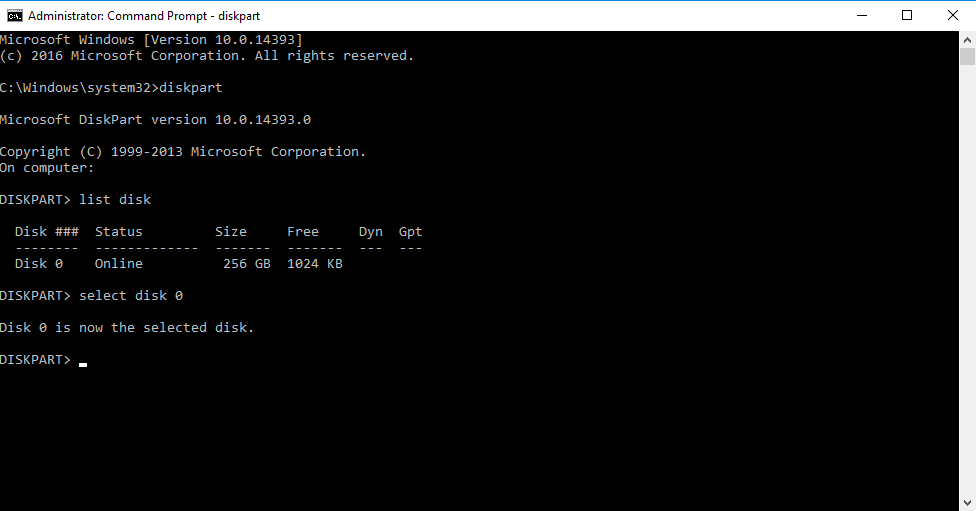](https://wikipedia.mutschlerhome.com/uploads/images/gallery/2024-04/k2YM5P3FllW1HONR-image.png) 9. List the partitions on the chosen drive so you can select the partition you created in step 5 by using the following command. ```powershell list partition ``` [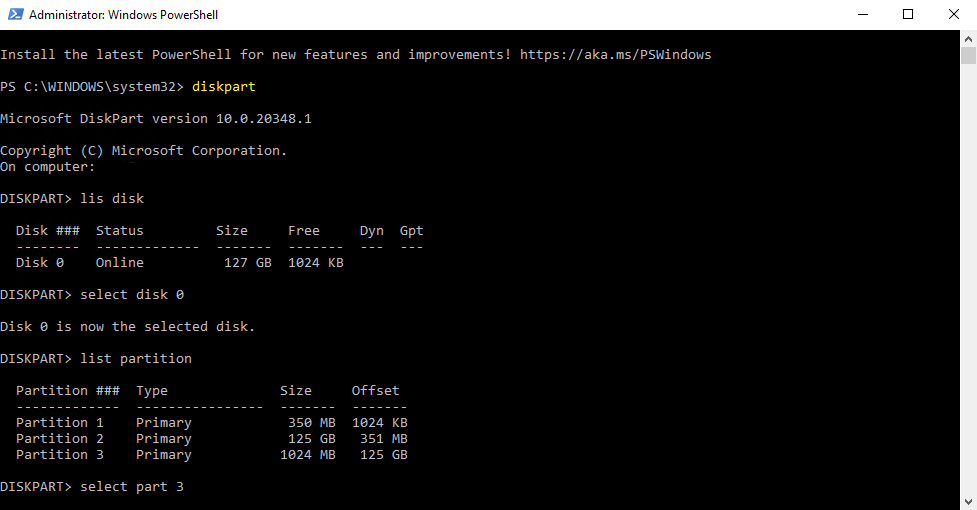](https://wikipedia.mutschlerhome.com/uploads/images/gallery/2024-04/CIlZucY8MHQcNZrS-image.png) 10. Select the partition you created in step 5 by using the following command. ```powershell select partition 3 ``` [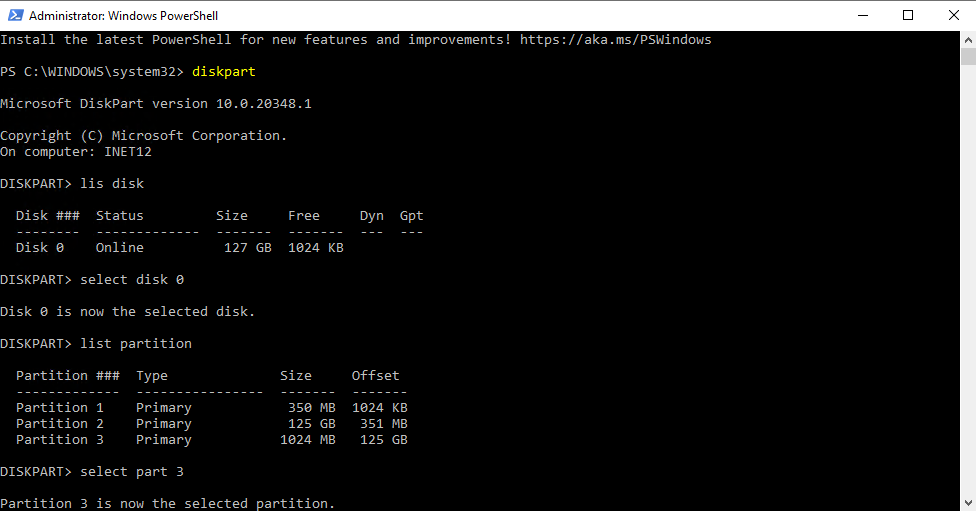](https://wikipedia.mutschlerhome.com/uploads/images/gallery/2024-04/GM1Tzbf4OvjRRw5s-image.png) 11. Set the partition ID based on the type of disk it is with the following command. For MBR disks: ```powershell set id=27 ``` For GPT disks: ```powershell set id="de94bba4-06d1-4d40-a16a-bfd50179d6ac" ```The disk will have an asterisk under the Gpt column in the section you listed the disk if it is GPT.
[](https://wikipedia.mutschlerhome.com/uploads/images/gallery/2024-04/qIwEHOJikPzlCLr7-image.png)For GPT disks, you will also have to set the GPT Attributes using the following command.
```powershell gpt attributes=0x8000000000000001 ``` 12. Exit diskpart and run the following command to enable the recovery partition. ```powershell reagentc /enable ``` [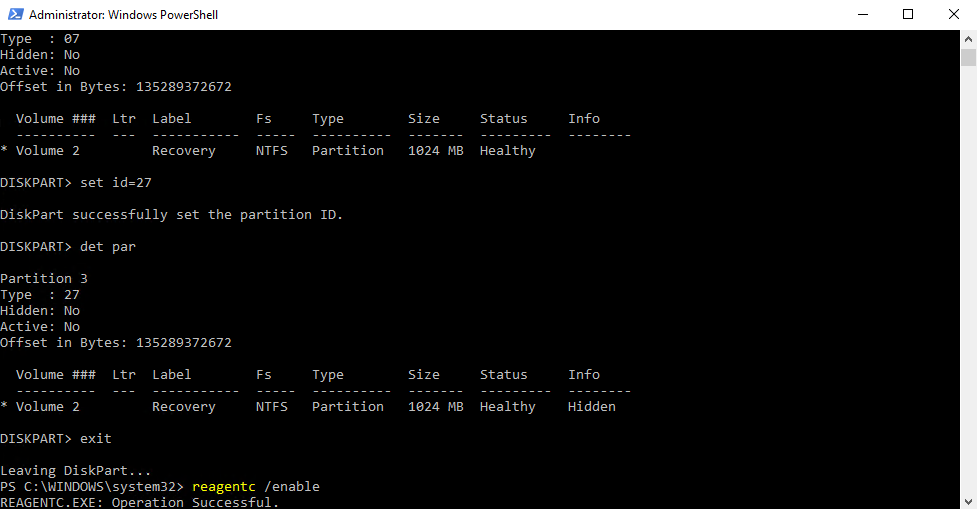](https://wikipedia.mutschlerhome.com/uploads/images/gallery/2024-04/8P8PQdKNIfX2b9rD-image.png) 13. After these steps, the PC will need to be rebooted. At this time, reboot the PC. #### **\#2. Create/Delete Recovery Partition while Creating Recovery Drive** There is another way to help you delete the partition. This trick appears during the process of creating a USB recovery drive. 1. Click “Search” icon, and enter `recovery drive` in the search box, and then select `Create a recovery drive`. [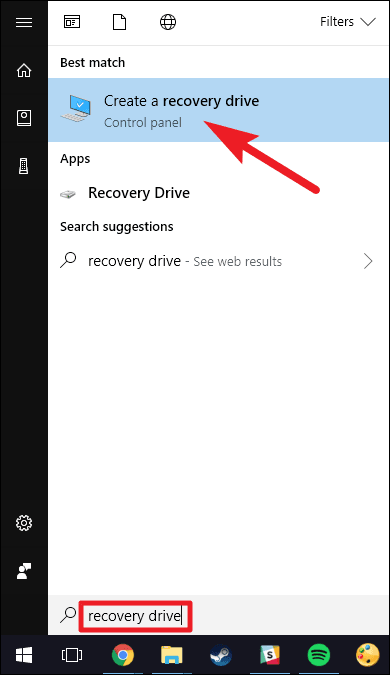](https://www.ubackup.com/screenshot/en/others/create-a-recovery-drive.png)Depending on your version of Windows, it may be listed as simply "Recovery Drive".
2. After the recovery drive tool opens, make sure the “**Back up system files to the recovery drive**” is selected, and then select **Next**. [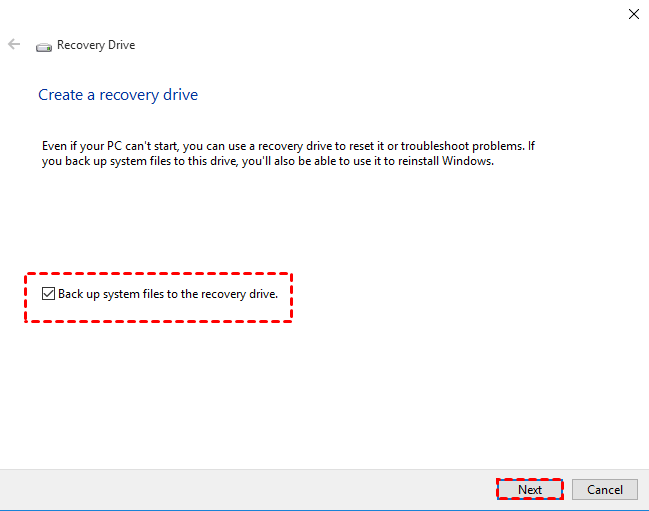](https://www.ubackup.com/okr/images/create-recovery-partition-on-windows-10-0326i/recovery-drive.png) 3. Insert a USB flash drive into your PC that's at least as large as the size indicated on the screen. Select the USB flash drive connected you connected and click “**Next**” to continue. [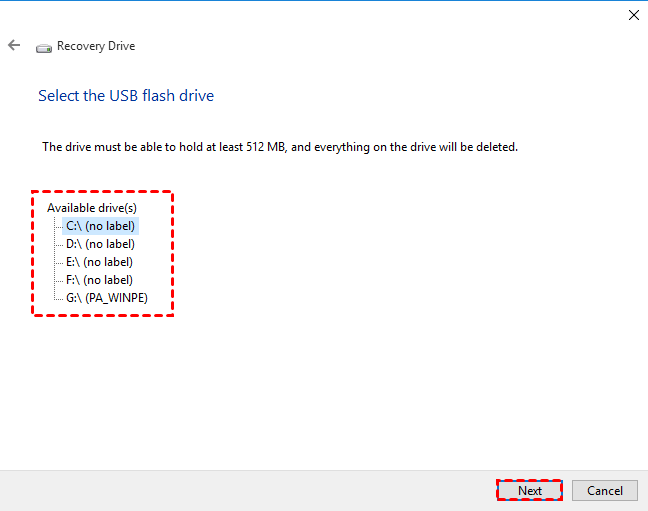](https://www.ubackup.com/okr/images/create-recovery-partition-on-windows-10-0326i/select-usb.png) 4. Click “**Create**” to begin creating the recovery drive. [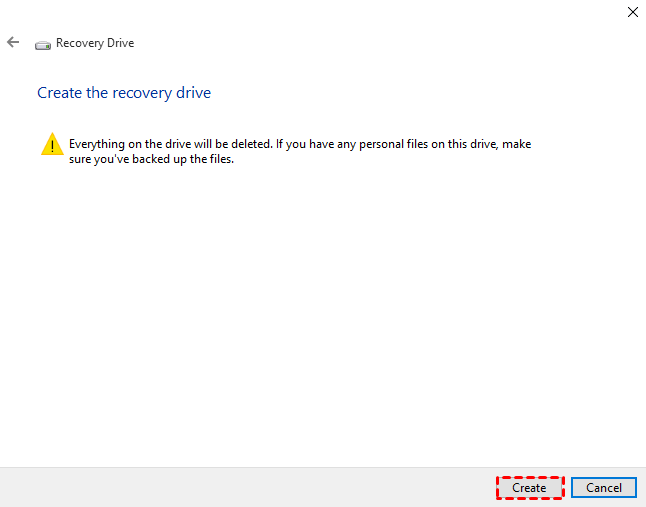](https://www.ubackup.com/okr/images/create-recovery-partition-on-windows-10-0326i/create.png) 5. When the process is done, do not select Finish. Select **Delete the recovery partition** to remove the recovery partition from your PC and free up disk space. Then click on **Delete**. This will free up the disk space used to store your recovery image. When the removal is done, select **Finish**.**Note✍:** Some PCs do not provide an option to delete the recovery partition. If you encounter this situation, it means that your PC does not have a recovery partition that uses additional disk space.