Windows Server and Client
- Create Recovery Partition
- Delete Recovery Partition
- How to Repair (Rebuild) the WMI Repository on Windows
Create Recovery Partition
#1. Create Recovery Partition Manually
First, verify there is no recovery partition.
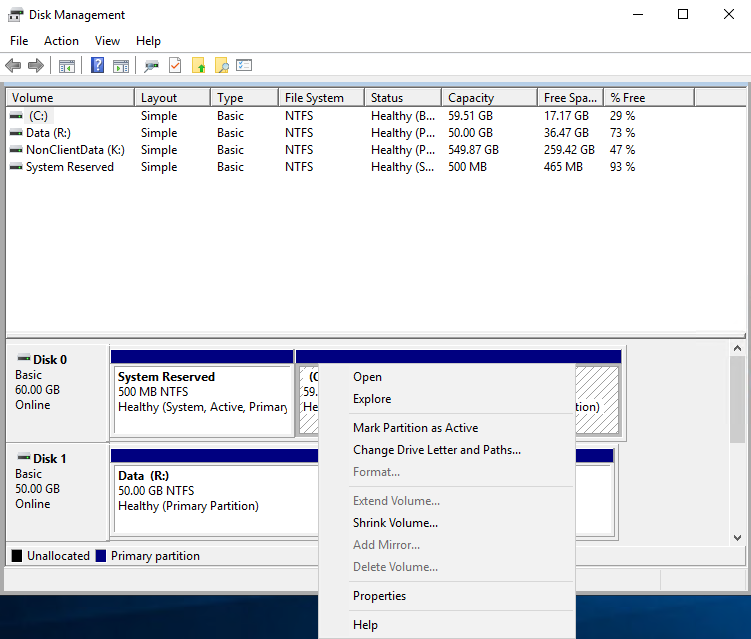
- Open Disk Manager by right clicking the start menu, and choosing
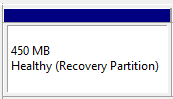
Disk Manager. - Verify you don't already have a recovery partition created. They will typically be under 1GB and next to the health status will be labeled
(Recovery Partition). If there is one created, follow these instructions to delete the partition.
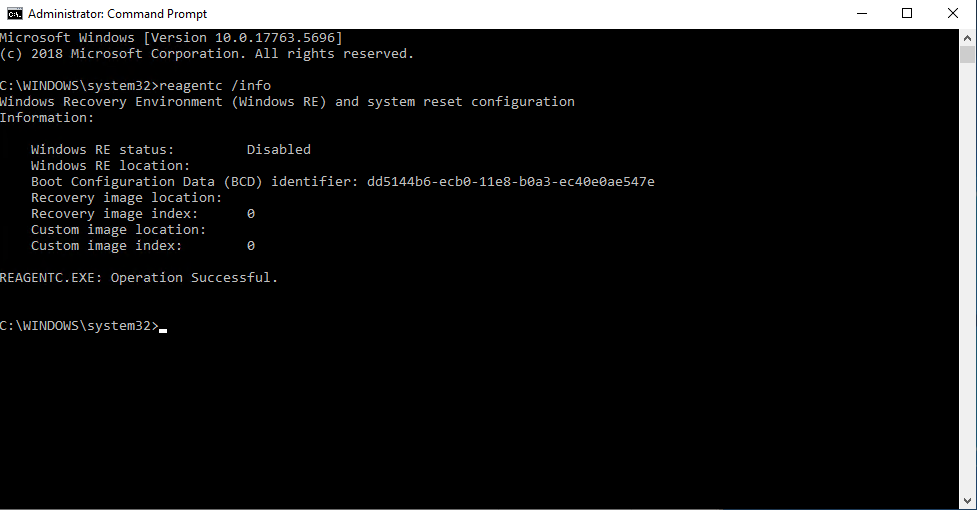
- Open an admin command prompt and enter the following command to verify the recovery partition is disabled.
reagentc /info
If the recovery partition is not disabled, run this command to disable it.
reagentc /disable - Using Disk Manager, choose and shrink the existing Windows partition to create space for the new recovery partition.

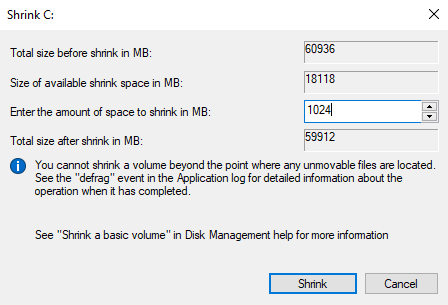
- In the
Shrinkoptions, in the "Enter the amount of space to shrink in MB:" field, enter 1024 and clickShrink.
- Once there is now enough space on the C drive to create a recovery partition, open an admin command prompt and enter.
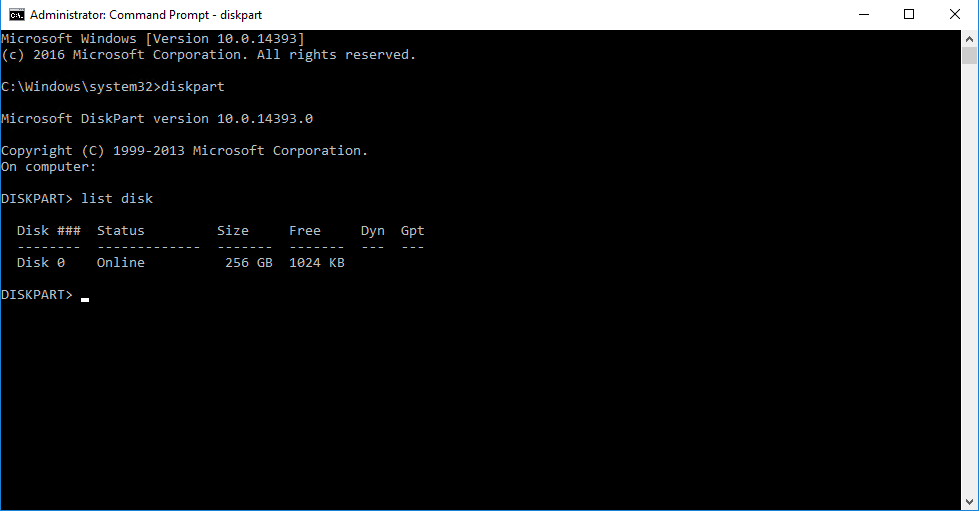
diskpart
- List the disks within diskpart by typing the following command.
list disk
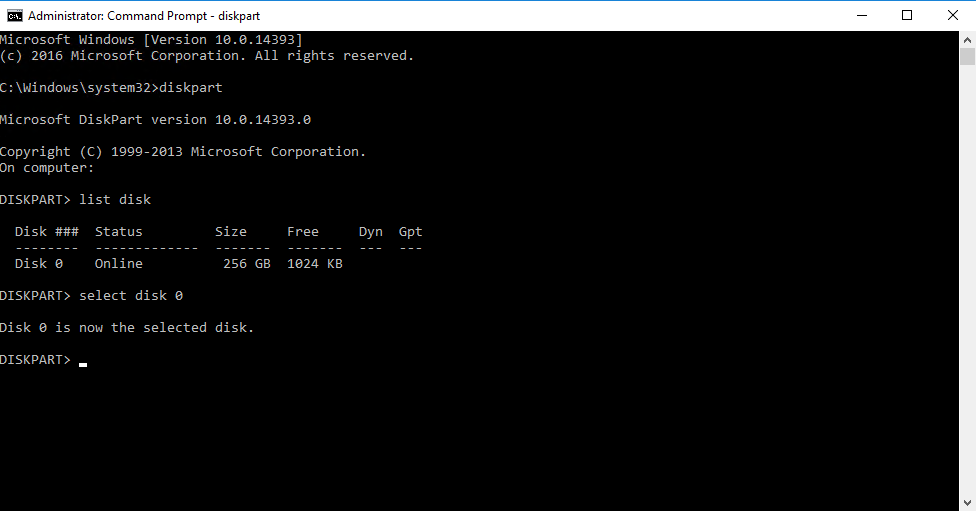
- Select the disk that you edited the partition for in step 5 using the following command (replace the number with the correct disk).
select disk 0
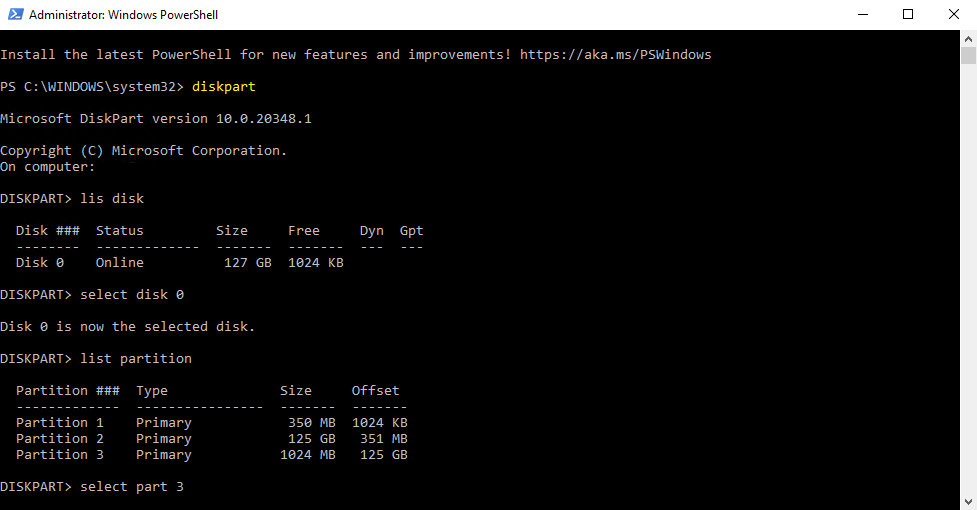
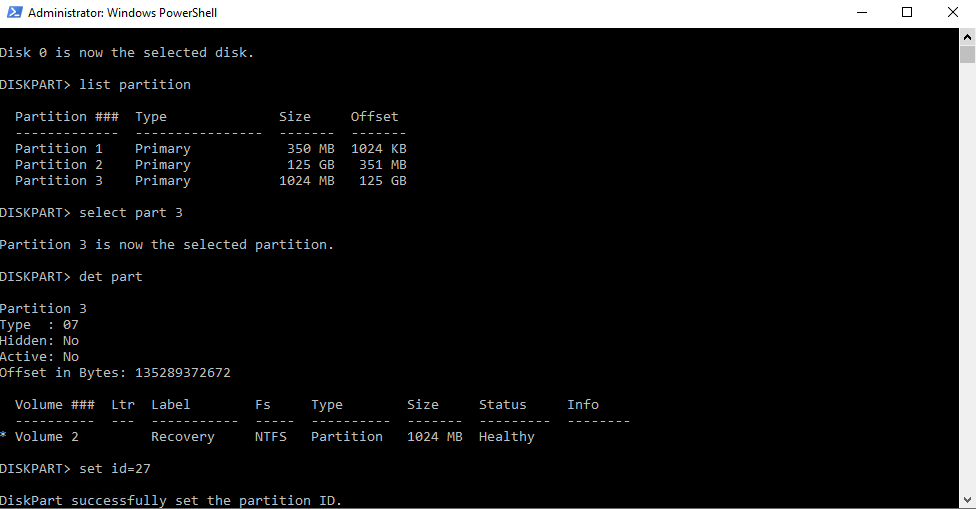
- List the partitions on the chosen drive so you can select the partition you created in step 5 by using the following command.
list partition
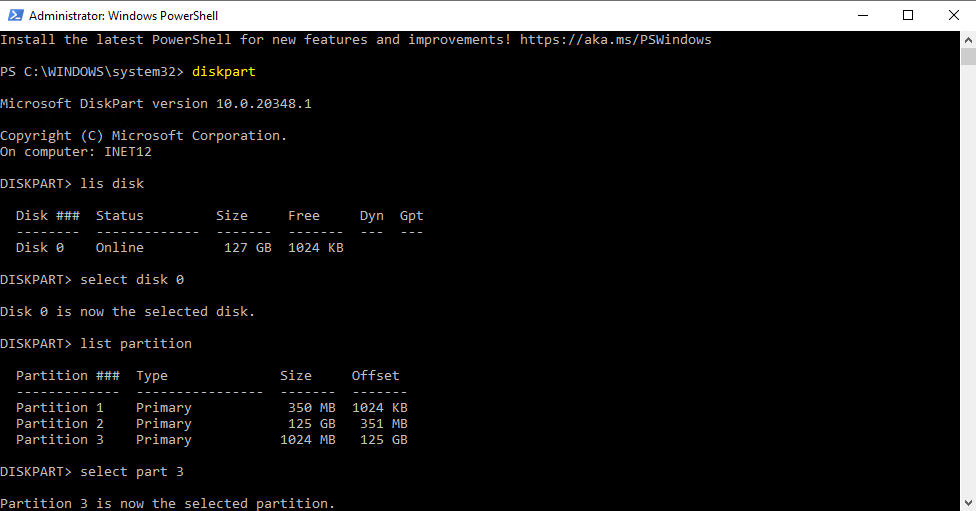
- Select the partition you created in step 5 by using the following command.
select partition 3
- Set the partition ID based on the type of disk it is with the following command.
For MBR disks:
set id=27For GPT disks:
set id="de94bba4-06d1-4d40-a16a-bfd50179d6ac"The disk will have an asterisk under the Gpt column in the section you listed the disk if it is GPT.

For GPT disks, you will also have to set the GPT Attributes using the following command.
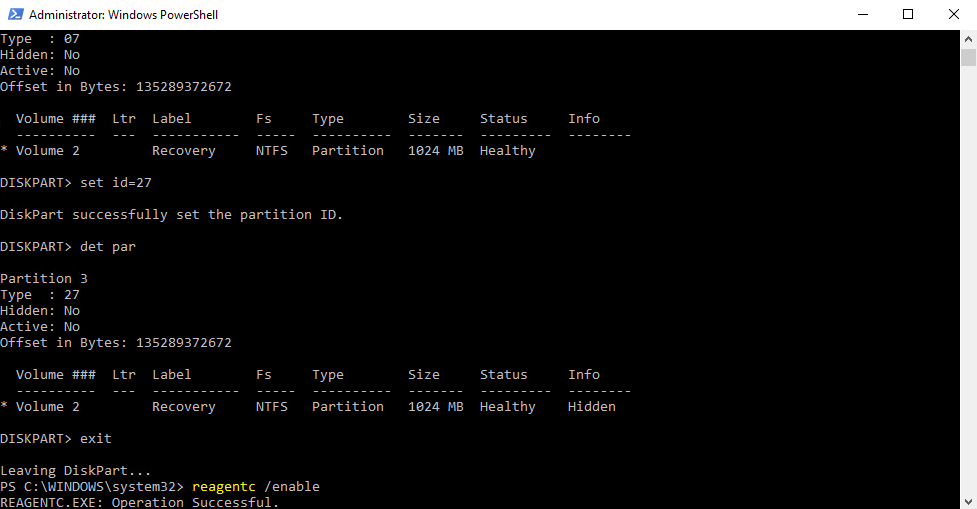
gpt attributes=0x8000000000000001 - Exit diskpart and run the following command to enable the recovery partition.
reagentc /enable
- After these steps, the PC will need to be rebooted. At this time, reboot the PC.

#2. Create/Delete Recovery Partition while Creating Recovery Drive
There is another way to help you delete the partition. This trick appears during the process of creating a USB recovery drive.
- Click “Search” icon, and enter
recovery drivein the search box, and then selectCreate a recovery drive.
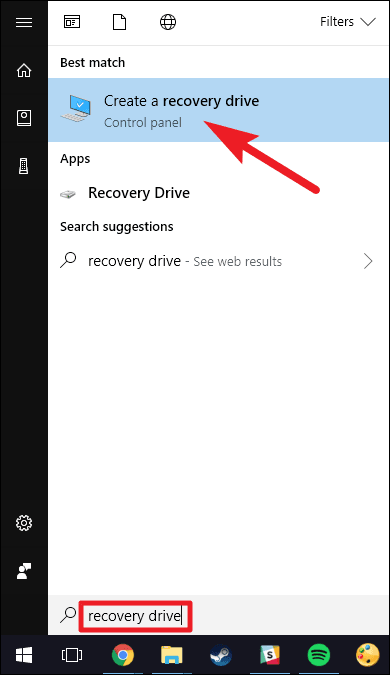
Depending on your version of Windows, it may be listed as simply "Recovery Drive".
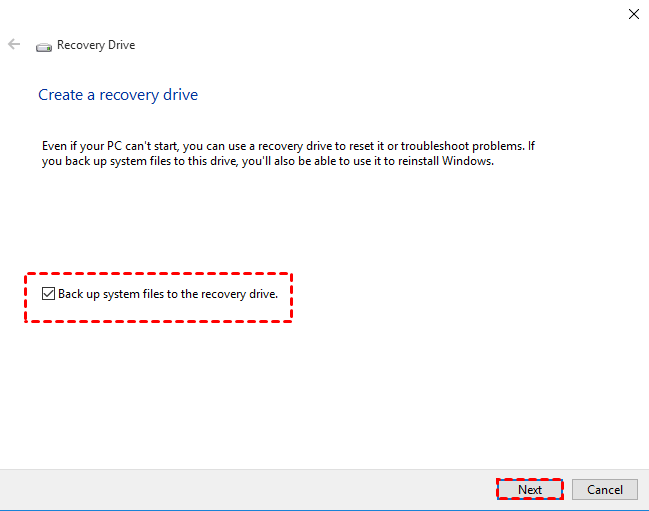
- After the recovery drive tool opens, make sure the “Back up system files to the recovery drive” is selected, and then select Next.
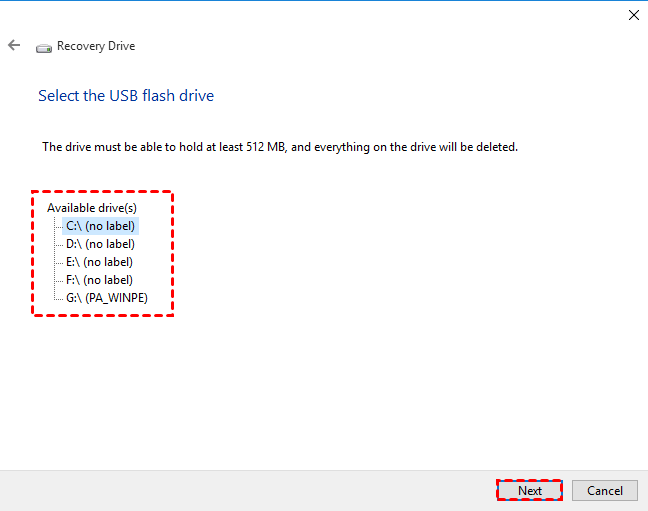
- Insert a USB flash drive into your PC that's at least as large as the size indicated on the screen. Select the USB flash drive connected you connected and click “Next” to continue.
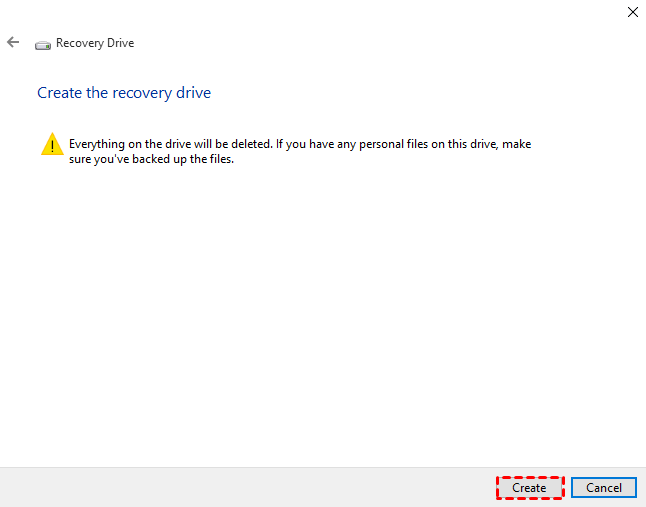
- Click “Create” to begin creating the recovery drive.
- When the process is done, do not select Finish. Select Delete the recovery partition to remove the recovery partition from your PC and free up disk space. Then click on Delete. This will free up the disk space used to store your recovery image. When the removal is done, select Finish.
Note✍: Some PCs do not provide an option to delete the recovery partition. If you encounter this situation, it means that your PC does not have a recovery partition that uses additional disk space.
Delete Recovery Partition
- Open an admin command prompt and enter.
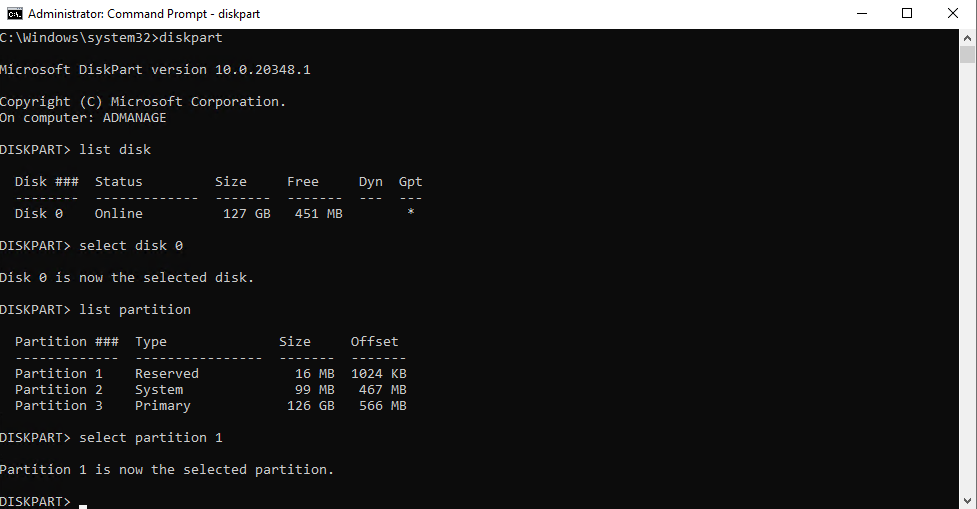
diskpart - List the disks within diskpart by typing the following command.
list disk - Select the disk that contains the recovery partition using the following command (replace the number with the correct disk).
select disk 0 - List the partitions on the chosen drive so you can select the recovery partition using the following command.
list partition
- Select the partition you believe is the recovery partition by using the following command.
select partition 1
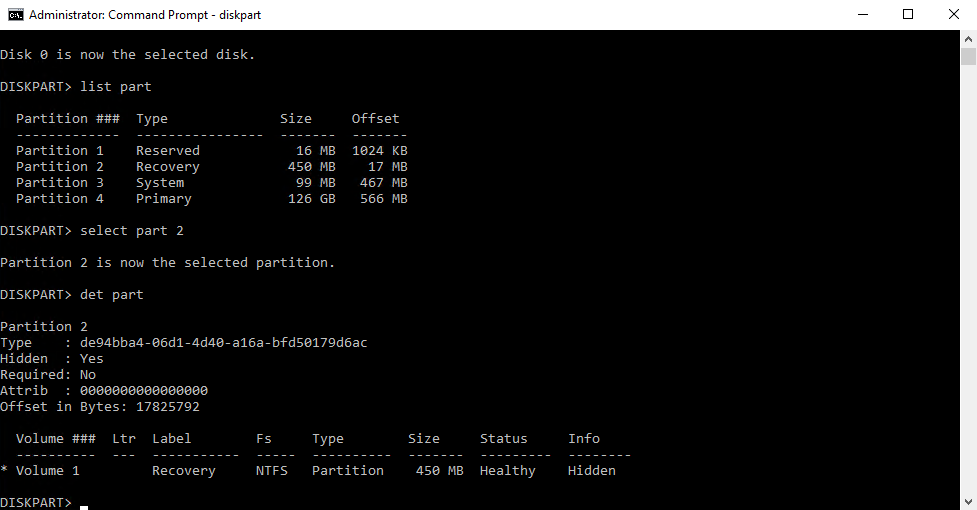
- List the partition details with the following command to verify it's the recovery partition.
For GPT disks, the
Typewill bede94bba4-06d1-4d40-a16a-bfd50179d6ac.
For MBR disks, theTypewill be27.det part
- After confirming the selected partition is the recovery partition, use the following command to delete it.
delete partition override

How to Repair (Rebuild) the WMI Repository on Windows
Every experienced Windows administrator has encountered with problems with the Windows Management Instrumentation (WMI) service and its components. WMI is an important subsystem of Windows, and if it malfunctions, the computer may be unable to run services, get system information from WMI providers, run scripts, or third-party apps. This article describes how to diagnose WMI health on Windows, troubleshoot and fix common problems when the WMI repository is corrupted.
The following problems can indicate corruption of the WMI repository:
-
- WMI query processing errors in system and application logs (
0x80041002 - WBEM_E_NOT_FOUND,WMI: Not Found,0x80041010 WBEM_E_INVALID_CLASS,Failed to initialize WMI class,Invalid classorInvalid namespace); - WMI-related GPO processing errors (incorrect operation of Group Policy WMI filters, etc.)
- Slow execution of WMI queries
- Errors during installation or operation of SCCM/SCOM agents;
- Errors in scripts (VBS or PowerShell) that access the WMI namespace (scripts with
Get-WmiObject,Get-CimInstance, etc.).
- WMI query processing errors in system and application logs (

Troubleshooting WMI Connectivity and Common Issues on Windows
First, verify that the Windows Management Instrumentation (winmgmt) service is installed and running on Windows. Check the service status in the services.msc console or by using PowerShell:
Get-Service Winmgmt | Select DisplayName,Status,ServiceName
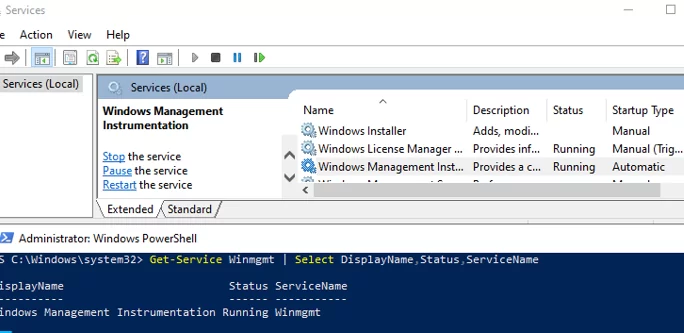
If the Winmgmt service is running, test the WMI health by running a simple WMI query. Execute a WMI query from the command prompt or PowerShell. For example, the following command lists the programs installed on Windows:
wmic product get name,version
Simple PowerShell command to get Windows version and build information through WMI:
get-wmiobject Win32_OperatingSystem
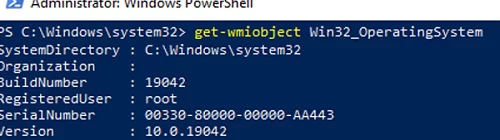
As you can see, the WMI service responded to the query correctly. If Windows returns an error when running such a WMI query, the WMI service is most likely not working properly, the WMI repository is corrupt, or there are some other problems with the WMI classes.
Run the command to enable logging of WMI calls in the Event Viewer:
wevtutil set-log Microsoft-Windows-WMI-Activity/Operational /enabled:true
Then open the Event Viewer console (eventvwr.msc) and go to Applications and Service Logs -> Microsoft -> Windows -> WMI Activity. The event description in EventID 5858 includes the WMI namespace and the class being accessed that is causing the error. If this is a special WMI class of a particular program, then that program may not have been installed correctly, or its files may be corrupted.
In my case, the error is related to the system-wide WMI class root\cimv2 : Win32_OperatingSystem, which means that the WMI database is corrupted.
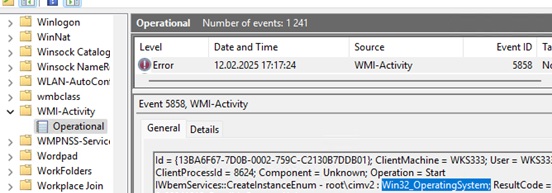
A Windows Management Instrumentation (WMI) query has failed. The WMI repository may be corrupted or it works incorrectly.
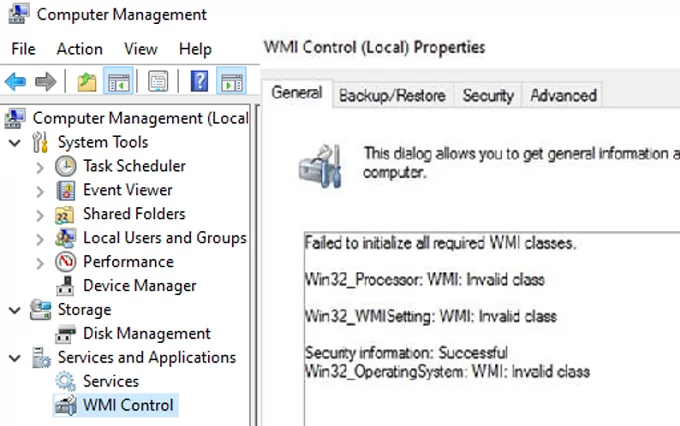
Open the WMI Control properties in the Computer Management snap-in (compmgmt.msc). In my case there is an error here:
Failed to initialize all required WMI classes
Win32_Processor. WMI: Invalid namespace
Win32_WMISetting. WMI: Invalid namespace
Win32_OperationSystem. WMI: Invalid namespace
Microsoft has even removed the WMIDiag download link from the Download Center. But if you want, you can find this script on the web. WMIDiag provides detailed information on how to troubleshoot specific WMI errors, but in most cases, the process is a time-consuming task and only worth the time if you are troubleshooting incidents on critical systems (such as production servers).
In the case of user workstations, it is usually easier and faster to reset and rebuild the WMI repository.
Repair the WMI Repository and Recompile the MOF files
To check the integrity of the WMI repository on Windows, use the command:
winmgmt /verifyrepository

If the command returns that the WMI database is in an inconsistent state (INCONSISTENT or WMI repository verification failed), it is worth trying to perform a soft fix of WMI repository errors:
Winmgmt /salvagerepository
WMI repository has been salvaged.
This command checks the consistency of the WMI repository and rebuilds the WMI database if any inconsistencies are found.
Restart the WMI service:
net stop Winmgmt
net start Winmgmt
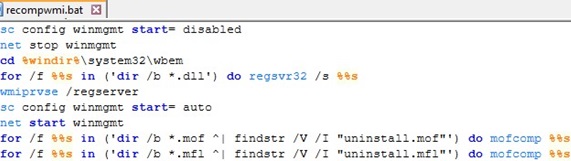
If the standard WMI fix doesn’t work, try to use the following script instead. This script is a “soft” way of restoring the WMI service on the computer (by re-registering the DLL libraries and WMI and recompiling the MOF files). This procedure is safe and should not cause any new problems.
sc config winmgmt start= disabled
net stop winmgmt
cd %windir%\system32\wbem
for /f %s in ('dir /b *.dll') do regsvr32 /s %s
wmiprvse /regserver
sc config winmgmt start= auto
net start winmgmt
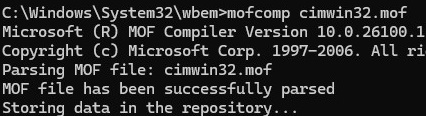
for /f %s in ('dir /b *.mof ^| findstr /V /I "uninstall.mof"') do mofcomp %s
for /f %s in ('dir /b *.mfl ^| findstr /V /I "uninstall.mfl"') do mofcomp %s
On a 64-bit version of Windows, these steps must also be performed for the SysWOW64 directory. Replace the third script line with:
cd %windir%\SysWOW64\wbem
You can run these commands by simply pasting them into the elevated command prompt, or by saving the code in the wmi_soft_repair.bat batch file and running it with administrator permissions (replace %s in the BAT file with %%s). After running the script, restart Windows and verify the WMI operation.
Rebuilding the WMI Repository in Windows
If the soft WMI recovery method discussed above didn’t help, use a “hard” way to repair the WMI service, which involves recreating the WMI repository.
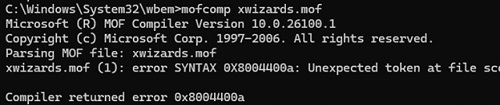
For example, in my case, the mofcomp command returned an error for almost all MOF files:
Microsoft (R) MOF Compiler Version 10.0.26100.1
Parsing MOF file: xwizards.mof
xwizards.mof (1): error SYNTAX 0X8004400a: Unexpected token at file scope
Compiler returned error 0x8004400a
%windir%\System32\Wbem\Repository ) is a database that contains information on the metadata and definitions of the WMI classes. If the WMI repository is corrupted, the Windows Management Instrumentation (Winmgmt) service may experience errors, including complete failure to start.If you suspect that the WMI repository is corrupted, rebuilding it is a last resort and should only be used if other means fail to repair the WMI.
The following command will reset the WMI database to its original state (like after a clean Windows install). Use this command to hard reset the WMI repository if the salvagerepository didn’t fix the problem:
Winmgmt /resetrepository
If both commands (Winmgmt /salvagerepository and Winmgmt /resetrepository) didn’t restore the consistent state of the WMI database, try to perform a hard reset of the WMI database with the following script:
net stop winmgmt
cd %windir%\system32\wbem
winmgmt /resetrepository
winmgmt /resyncperf
if exist Repos_bakup rd Repos_bakup /s /q
rename Repository Repos_bakup
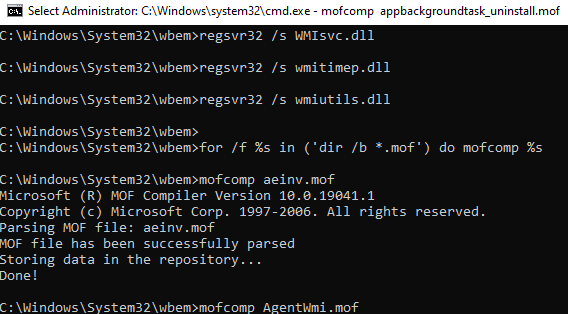
regsvr32 /s %systemroot%\system32\scecli.dll
regsvr32 /s %systemroot%\system32\userenv.dll
for /f %s in ('dir /b *.dll') do regsvr32 /s %s
for /f %s in ('dir /b *.mof ^| findstr /V /I "uninstall.mof"') do mofcomp %s
for /f %s in ('dir /b *.mfl ^| findstr /V /I "uninstall.mfl"') do mofcomp %s
sc config winmgmt start= auto
net start winmgmt
wmiprvse /regserver
This script removes and recreates the WMI repository (the old repository is saved to the Repos_backup directory). Restart Windows after the script has finished. Then use a simple query to test WMI connectivity.
Check the WMI repository state. If the errors are fixed, the winmgmt /verifyrepository command should return:
WMI repository is consistent
![]()
In this article, we have discussed the basic ways to diagnose and repair the WMI service and the WMI repository.