Microsoft 365 - Walkthroughs
Email Management
Delete Email From All Mailboxes In Office 365
It is no secret that mail hygiene solutions are not 100% effective. Malicious messages still make their way through without being detected from time to time. In those times, you need to know how to find and delete email from all mailboxes in Office 365.
If you are an Office 365 admin, you would be familiar with the situation described above. Spam or Phishing attacks are considered as critical security incidents. Needless to say, email admins must act quickly to minimize the potential threat to the users and the infrastructure.
You can click around in the Office 365 Security and Compliance portal to run a content search, but, to delete those contents, you need to use PowerShell. So, if you’ll end up using PowerShell anyway, why not do everything in PowerShell, right?
In this article, you will learn how to use the Security and Compliance PowerShell cmdlets to search and delete malicious messages from all Office 365 mailboxes.
Requirements
Since this article is essentially a How-To, there are some requirements if you plan to follow along.
Your admin account must have enough Office 365 permissions to search mailboxes and delete messages.
– Permission required to search mailboxes: The account must be a member of the eDiscovery Manager role group or be assigned the Compliance Search management role.
– Permission required to delete messages: The account must be a member of the Organization Management role group or be assigned the Search And Purge management role
– Permission required to preview messages: The account must be a member of the eDiscovery Manager role group or be assigned the Preview management role
PowerShell must be connected to the Office 365 Security & Compliance Center PowerShell. Follow this link to connect without MFA, or this link to connect with MFA
Gathering Information About the Message to Delete
Before you start creating the content search for the message that needs to be deleted, you must gather all the pertinent information about the message first. Not unless all information is provided to you already.
Knowing as many details about the message as possible would help you decide how to formulate the search query. For example, some of the most basic information you need to get are:
- What is the sender’s email address?
- What is the message subject?
- Are there file attachments, and what are the filenames?
- What’s the date of the first reported occurrence?
- Who are the recipients?
In most cases, one or two of the information listed above should be sufficient to formulate a search query. Then, it is up to you to determine which of these search parameters would be most applicable.
Creating and Running the Office 365 Email Content Search
When you’re satisfied that you have all the information you need about the message, it is time to fire up PowerShell and start creating the content search.
Suppose the spam/phishing message to delete has the following properties:
Subject: You must change your bank password now
Sent: 05/12/2020
Using the New-ComplianceSearch, the message properties listed above will be used to create a search query. The key to keeping the search results as accurate as possible depends on the adequately formulated search criteria.
The New-ComplianceSearch cmdlet comes with several parameters and switches. However, to create a mailbox content search, these are the parameters that will be used.
Name– This accepts the name that will be assigned to the content search object. This can be any name, you don’t need to put too much thought into it.ExchangeLocation– This accepts that Exchange location that will be targeted by the search. This can be a group or a mailbox. In this article, the value to use is All to make sure to target all mailboxes in the search.ContentMatchQuery– This parameter is the main factor that will determine the search results’ accuracy. The query format that is accepted is in the form of a KQL or Keyword Query Language.
To create the content search, copy the code below and paste it into your PowerShell console. Make sure to change the parameter values as appropriate to your situation. In this example, the name of the search is Phish1, the query combines the subject and sent property values.
New-ComplianceSearch `
-Name Phish1 `
-ExchangeLocation All `
-ContentMatchQuery 'subject:"You must change your bank password now" AND sent:05/12/2020' |
|---|
| Delete Email From All Mailboxes In Office 365 : Creating a new content search |
When you run the code above in PowerShell, you should see a similar output as demonstrated below.
At this point, the content search job has been created, but the search hasn’t been triggered yet according to the status (NotStarted).
To start the content search, use the Start-ComplianceSearch cmdlet. You need to supply the cmdlet with the parameter -Identity and specify the name of the content search job that you created.
To start the Office 365 email content search, copy the code below and paste it into your PowerShell console.
Start-ComplianceSearch -Identity Phish1After running the code above, there will be no output on the screen. What you need to do next is to monitor the status of the search. To monitor the search status, use the code below in PowerShell.
Get-ComplianceSearch -Identity Phish1When you run the code above, you should see a similar output as below. In the output below, it shows that the content search job status is Completed.
 |
|---|
| Getting the content search status |
You’ll notice from the output above that the returned properties are limited and it does not show you the number of found matches. You can run the command below to get all the properties of the content search result.
Get-ComplianceSearch -Identity Phish1 | Format-List *After running the command above, you would see a similar result, as shown below. In this case, there are 16 items that matched the search criteria.
 |
|---|
| Content search results |
Previewing the Search Results (Optional)
Previewing the search results is an optional step, but recommended if you’re the type who’d rather err on the side of caution. You wouldn’t want to delete the wrong message from all mailboxes, would you?
So far, you’ve used the New-ComplianceSearch, Start-ComplianceSearch and Get-ComplianceSearch cmdlets to create, run, and monitor the content search. Now, to be able to preview the search results, you will need to use the New-ComplianceSearchAction cmdlet.
To preview the search results, you now need to create a preview action using the command below.
New-ComplianceSearchAction -SearchName Phish1 -PreviewAs you can see in the output below, the preview job has been created with the name Phish1_Preview, and the job is automatically started.
 |
|---|
| Phish1_Preview |
And when the creation of the preview is completed, you can get the results preview by running the command below to show the results on the screen.
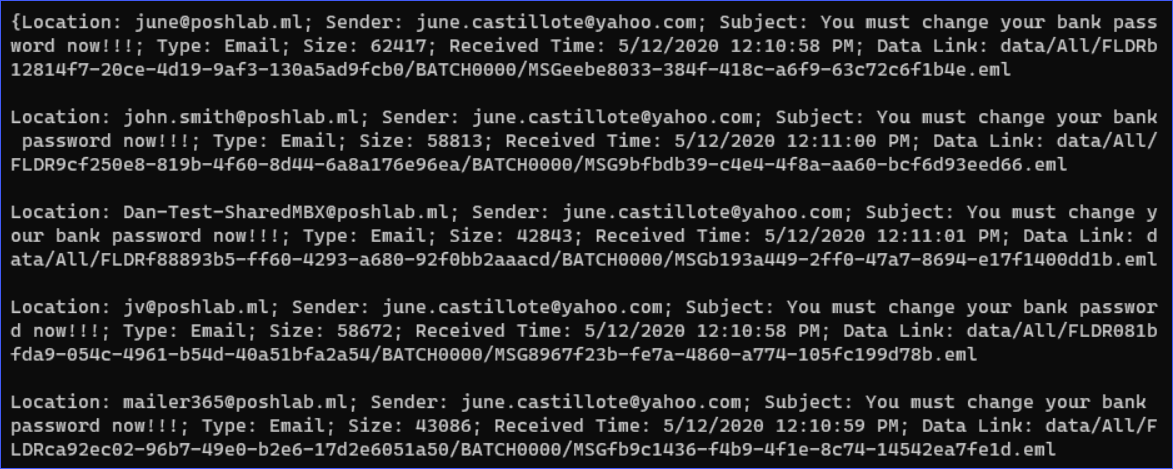
(Get-ComplianceSearchAction Phish1_Preview | Select-Object -ExpandProperty Results) -split ","And once you run the command above, you would get an output similar to the image shown below.
 |
|---|
| Previewing the search results |
Let’s admit it, the results, as shown above, is ugly. However, you can export the results to a TXT if you prefer. Or, if you want a better-formatted report, you can download the content search report from the Security and Compliance Center portal.
Note: The Preview action does not expose the contents of the messages. It only shows the details of the message matching the search criteria and not what’s inside of each message.
Delete Email From All Mailboxes In Office 365
Now for the final act; running the Office 365 delete email action. Suppose that you’re already satisfied with the search results. You’re now ready to run the message deletion process.
To delete the messages that matched the search criteria, you need to create a purge job using the New-ComplianceSearchAction cmdlet with the -Purge switch and -PurgeType parameter.
The code to create the purge job is shown below. Copy the code and paste in PowerShell to run it.
New-ComplianceSearchAction -SearchName Phish1 -Purge -PurgeType SoftDeleteNote that the -PurgeType SoftDelete parameter/value would remove the messages and put them in the Deletions folder inside the Recoverable Items folder in the mailbox. This means that the message would still be recoverable if necessarry.
After running the code above, the purge job will be created and started.
 |
|---|
| Create the message purge job |
As you can see on the image below, the purge job is created with the name Phish1_Purge, and it automatically started.
 |
|---|
| Purge job is created and started |
When the purge is complete, you can view the final result using the command below.
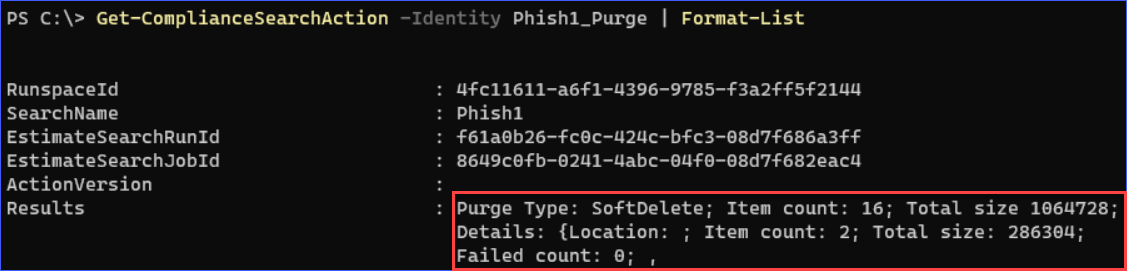
Get-ComplianceSearchAction -Identity Phish1_Purge | Format-ListYou would be presented with similar output, as shown below. In this example, there were 16 messages deleted, and none failed.
 |
|---|
| Message purge job is complete |
And that’s it. You have successfully deleted the spam/phishing messages from all Office 365 mailbox.
Conclusion
In this article, you learned how to use the Security and Compliance PowerShell cmdlets to search and delete messages from all mailboxes in Office 365.
You’ve learned how to put together the details of the message to delete for refining search criteria. Refining the search criteria helps ensure that the results will be at the highest accuracy.
You also learned how to create and start the content searches, create a preview of the results, and ultimately purge the messages that matched the search criteria. Perhaps the best thing about all this is that you never had to leave PowerShell to accomplish these tasks!
With the knowledge you gained from this article, perhaps you can automate the entire search and delete workflow so that even your first-line agents can easily execute it. Maybe then, you will not have to be woken up from your much-needed sleep anymore.
Reports
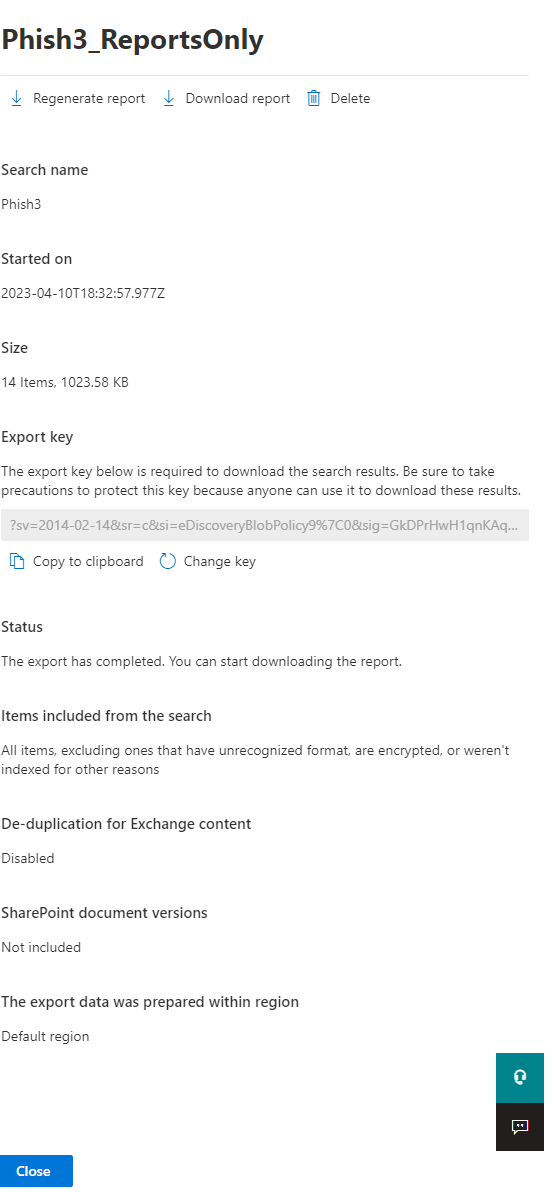
Download Email Report From Compliance Portal
Instead of exporting the full set of search results from a Content search in the Microsoft Purview compliance portal (or from a search that's associated with a Microsoft Purview eDiscovery (Standard) case), you can export the same reports that are generated when you export the actual search results.
When you export a report, the report files are downloaded to a folder on your local computer that has the same name as the Content Search, but that's appended with _ReportsOnly. For example, if the Content Search is named ContosoCase0815, then the report is downloaded to a folder named ContosoCase0815_ReportsOnly.
Note: You MUST use Microsoft Edge to download this report. An EXE is generated that will only work with Edge, and no other browsers.
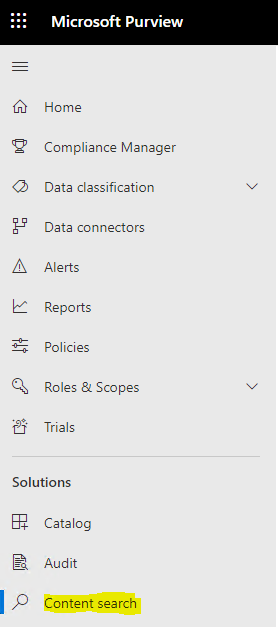
1. Go to https://compliance.microsoft.com/
2. Click on Content Search in the left pane
3. Click the report that was generated and click the Actions button within the new window that pops up
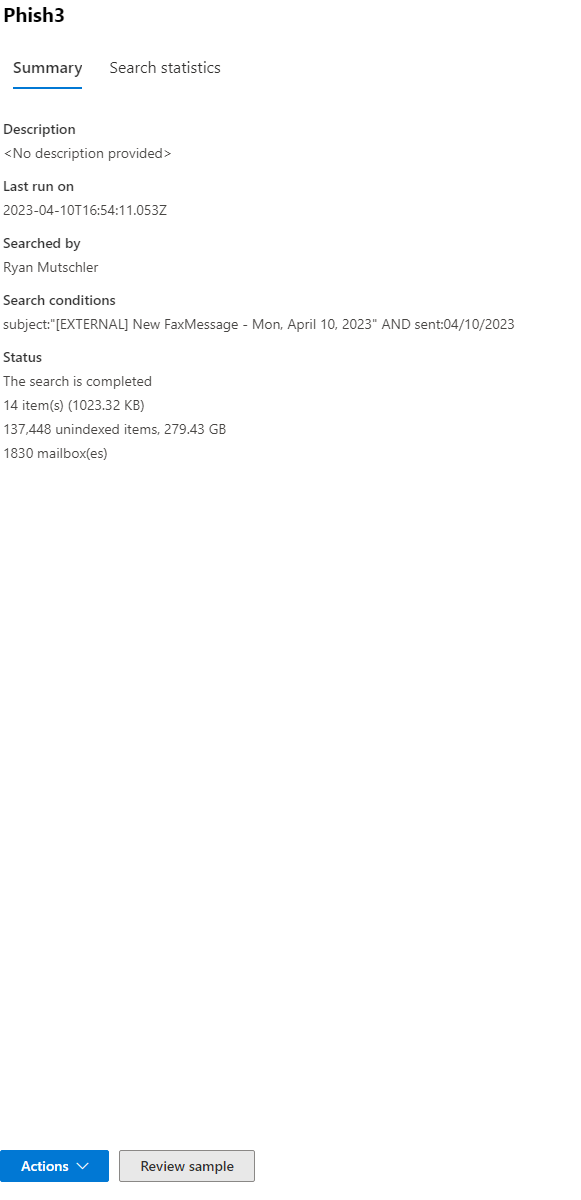
4. Make sure "All items, excluding ones that have unrecognized format, are encrypted, or weren't indexed for other reasons" then click "Generate Report"
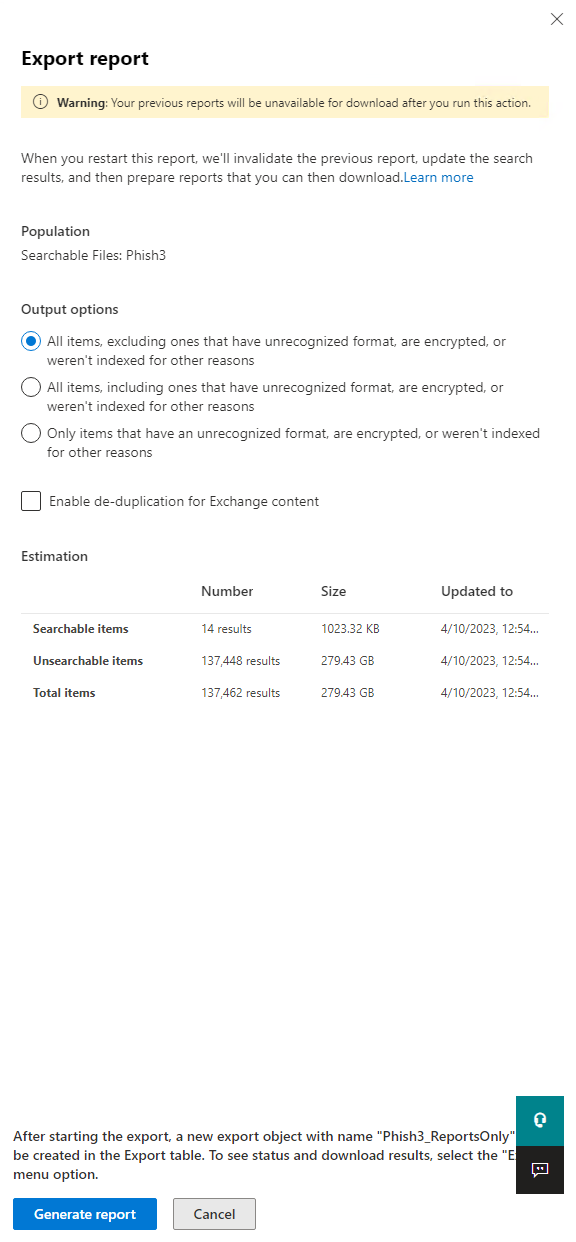
5. The report will then be generated under the "Export" tab, click that and choose the report you just created. Once the new window opens, ensure you are using Microsoft Edge, then click on "Download Report". In this same dialog box, click the button below to Copy to Clipboard.
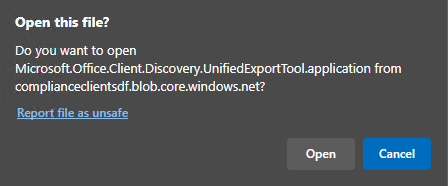
6. You may be prompted to Open "Microsoft.Office.Client.Discovery.UnifiedExportTool". Click yes on this prompt.
7. It will run a program and prompt you with a dialog for the eDiscovery Export Tool. In the top box, paste the string you copied to your clipboard in step 5, and selected a location to store your files in the bottom box.

¶8. You can then open the location you chose to store these files, and there will be a file called Results.csv that you can open and display your export.
Group Management
Manage Who Can Create Microsoft 365 Groups
By default, all users can create Microsoft 365 groups. This is the recommended approach because it allows users to start collaborating without requiring assistance from IT.
If your business requires that you restrict who can create groups, you can restrict Microsoft 365 Groups creation to the members of a particular Microsoft 365 group or security group.
If you're concerned about users creating teams or groups that don't comply with your business standards, consider requiring users to complete a training course and then adding them to the group of allowed users.
When you limit who can create a group, it affects all services that rely on groups for access, including: Outlook, SharePoint, Viva Engage, Microsoft Teams, Planner, Power BI (classic), Project for the web / Roadmap
The steps in this article won't prevent members of certain roles from creating Groups. Microsoft 365 global admins can create groups via the Microsoft 365 admin center, Planner, Exchange, and SharePoint, but not other locations such as Teams. Other roles can create Microsoft 365 Groups via limited means, listed below.
- Exchange Administrator: Exchange admin center, Microsoft Entra ID
- Partner Tier 1 Support: Microsoft 365 admin center, Exchange admin center, Microsoft Entra ID
- Partner Tier 2 Support: Microsoft 365 admin center, Exchange admin center, Microsoft Entra ID
- Directory Writers: Microsoft Entra ID
- Groups Administrator: Microsoft Entra ID
- SharePoint Administrator: SharePoint admin center, Microsoft Entra ID
- Teams Service Administrator: Teams admin center, Microsoft Entra ID
- User Administrator: Microsoft 365 admin center, Microsoft Entra ID
If you're a member of one of these roles, you can create Microsoft 365 Groups for restricted users, and then assign the user as the owner of the group.
Licensing requirements
To manage who creates groups, the following people need Microsoft Entra ID P1 or P2 licenses or Microsoft Entra Basic EDU licenses assigned to them:
- The admin who configures these group creation settings
- The members of the group who are allowed to create groups
Note: See Assign or remove licenses in the Microsoft Entra admin center for more details about how to assign Azure licenses.
The following people don't need Microsoft Entra ID P1 or P2 or Microsoft Entra Basic EDU licenses assigned to them:
- People who are members of Microsoft 365 groups and who don't have the ability to create other groups.
Step 1: Create a group for users who need to create Microsoft 365 groups
Only one group in your organization can be used to control who is able to create Microsoft 365 Groups. But, you can nest other groups as members of this group.
Admins in the roles listed above do not need to be members of this group: they retain their ability to create groups.
-
In the admin center, go to the Groups page.
-
Click on Add a Group.
-
Choose the group type you want. Remember the name of the group! You'll need it later.
-
Finish setting up the group, adding people or other groups who you want to be able to create groups as members (not owners).
For detailed instructions, see Create, edit, or delete a security group in the Microsoft 365 admin center.
Step 2: Run PowerShell commands
You must use the preview version of Azure Active Directory PowerShell for Graph (AzureAD) (module name AzureADPreview) to change the group-level guest access setting:
-
If you haven't installed any version of the Azure AD PowerShell module before, see Installing the Azure AD module and follow the instructions to install the public preview release.
-
If you have the 2.0 general availability version of the Azure AD PowerShell module (AzureAD) installed, you must uninstall it by running
Uninstall-Module AzureADin your PowerShell session, and then install the preview version by runningInstall-Module AzureADPreview. -
If you have already installed the preview version, run
Update-Module AzureADPreviewto make sure it's the latest version of this module.
Copy the script below into a text editor, such as Notepad, or the Windows PowerShell ISE.
Replace <GroupName> with the name of the group that you created. For example:
$GroupName = "Group Creators"
Save the file as GroupCreators.ps1.
In the PowerShell window, navigate to the location where you saved the file (type "CD <FileLocation>").
Run the script by typing:
.\GroupCreators.ps1
and sign in with your administrator account when prompted.
$GroupName = "<GroupName>"
$AllowGroupCreation = $False

Connect-AzureAD

$settingsObjectID = (Get-AzureADDirectorySetting | Where-object -Property Displayname -Value "Group.Unified" -EQ).id
if(!$settingsObjectID)
{
    $template = Get-AzureADDirectorySettingTemplate | Where-object {$_.displayname -eq "group.unified"}
    $settingsCopy = $template.CreateDirectorySetting()
    New-AzureADDirectorySetting -DirectorySetting $settingsCopy
    $settingsObjectID = (Get-AzureADDirectorySetting | Where-object -Property Displayname -Value "Group.Unified" -EQ).id
}

$settingsCopy = Get-AzureADDirectorySetting -Id $settingsObjectID
$settingsCopy["EnableGroupCreation"] = $AllowGroupCreation

if($GroupName)
{
  $settingsCopy["GroupCreationAllowedGroupId"] = (Get-AzureADGroup -SearchString $GroupName).objectid
} else {
$settingsCopy["GroupCreationAllowedGroupId"] = $GroupName
}
Set-AzureADDirectorySetting -Id $settingsObjectID -DirectorySetting $settingsCopy

(Get-AzureADDirectorySetting -Id $settingsObjectID).Values
The last line of the script will display the updated settings:
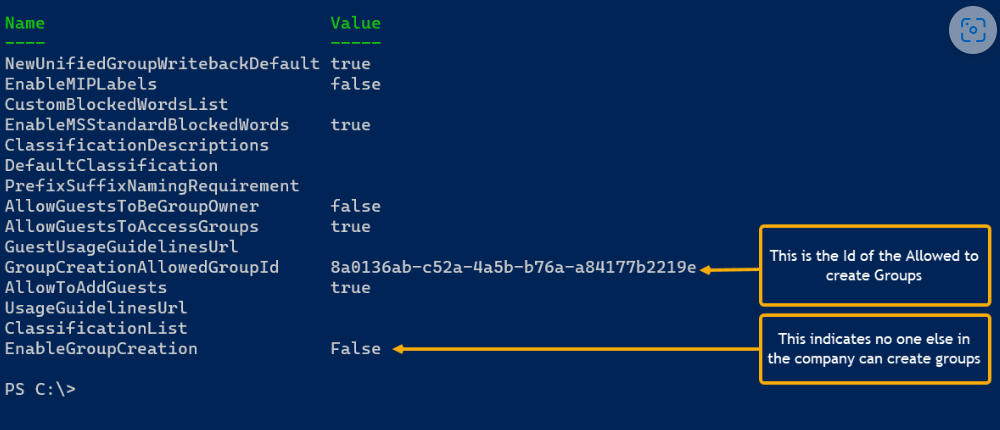
If in the future you want to change which group is used, you can rerun the script with the name of the new group.
If you want to turn off the group creation restriction and again allow all users to create groups, set $GroupName to "" and $AllowGroupCreation to "$true" and rerun the script.
Step 3: Verify that it works
Changes can take thirty minutes or more to take effect. You can verify the new settings by doing the following:
-
Sign in to Microsoft 365 with a user account of someone who should NOT have the ability to create groups. That is, they are not a member of the group you created or an administrator.
-
Select the Planner tile.
-
In Planner, select New Plan in the left navigation to create a plan.
-
You should get a message that plan and group creation is disabled.
Try the same procedure again with a member of the group.
Note: If members of the group aren't able to create groups, check that they aren't being blocked through their OWA mailbox policy.
Related topics
Collaboration governance planning recommendations
Create your collaboration governance plan
Getting started with Office 365 PowerShell
Set up self-service group management in Microsoft Entra ID
Microsoft Entra cmdlets for configuring group settings
Configuration
Forward Emails to Solar Winds Service Desk
 |
|---|
| Categories |
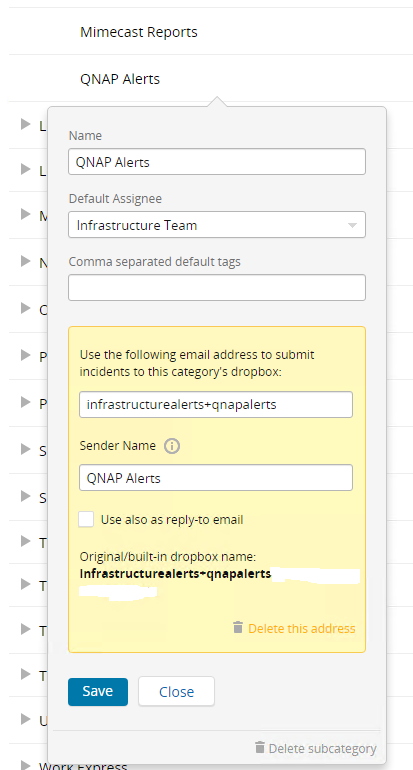
- Once the category is created, click the pencil icon to edit it and create an
Email Dropbox. Copy the email address in here for later and click the save button.
 |
|---|
| Email Dropbox |
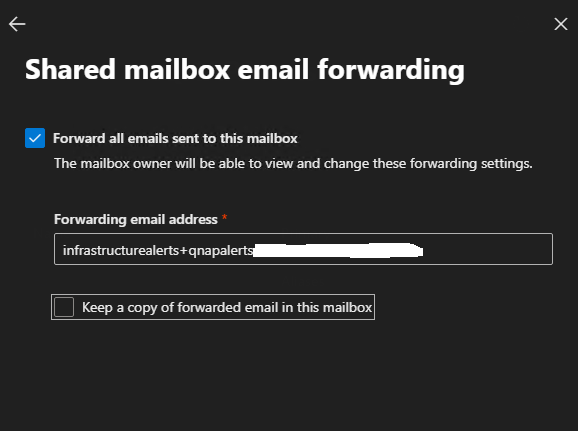
- Go back to the Admin Console, click the mailbox you created in step 1, click edit on the
Email Forwardingedit button, check the box to enable forwarding, and paste the email address you received from step 3. Make sure to also unceckKeep a copy of forwarded email in this mailboxunless you want to still receive emails in this shared mailbox for testing.
 |
|---|
| Email Forwarding |
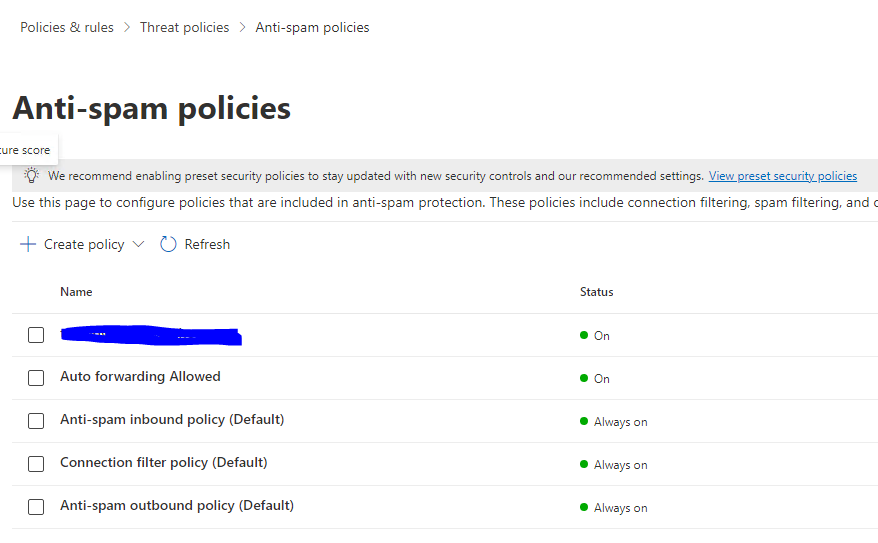
- From here, go to the Security Portal, click
Policies & Rules,Threat Policies,Anti-Spam Policies, and click the rule calledAuto Forwarding Allowed.
 |
|---|
| Anti-Spam Policies |
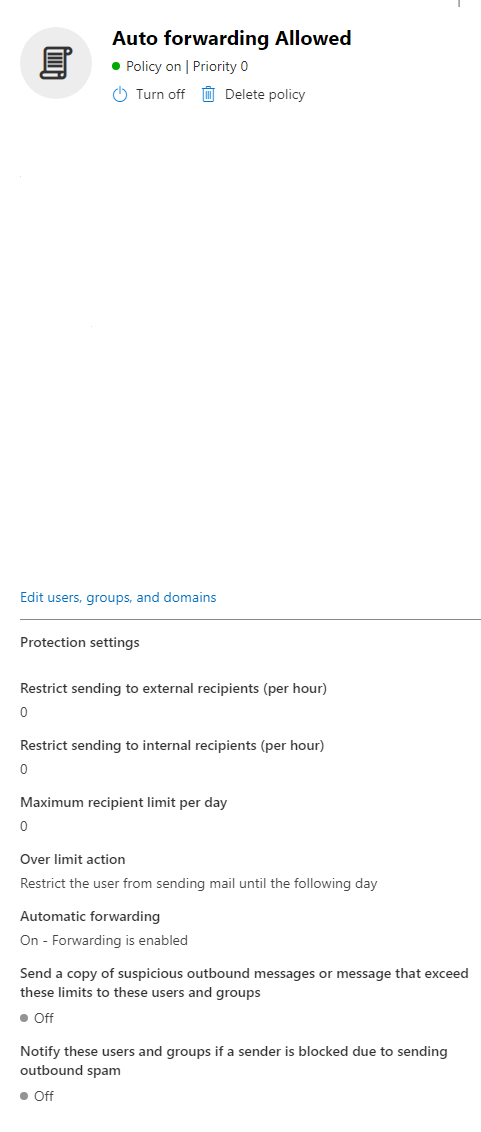
- Once inside the rule labeled
Auto Forwarding Allowed, scroll to the bottom to find the link forEdit users, groups, and domains, and click this.
 |
|---|
| Auto Forwarding Allowed |
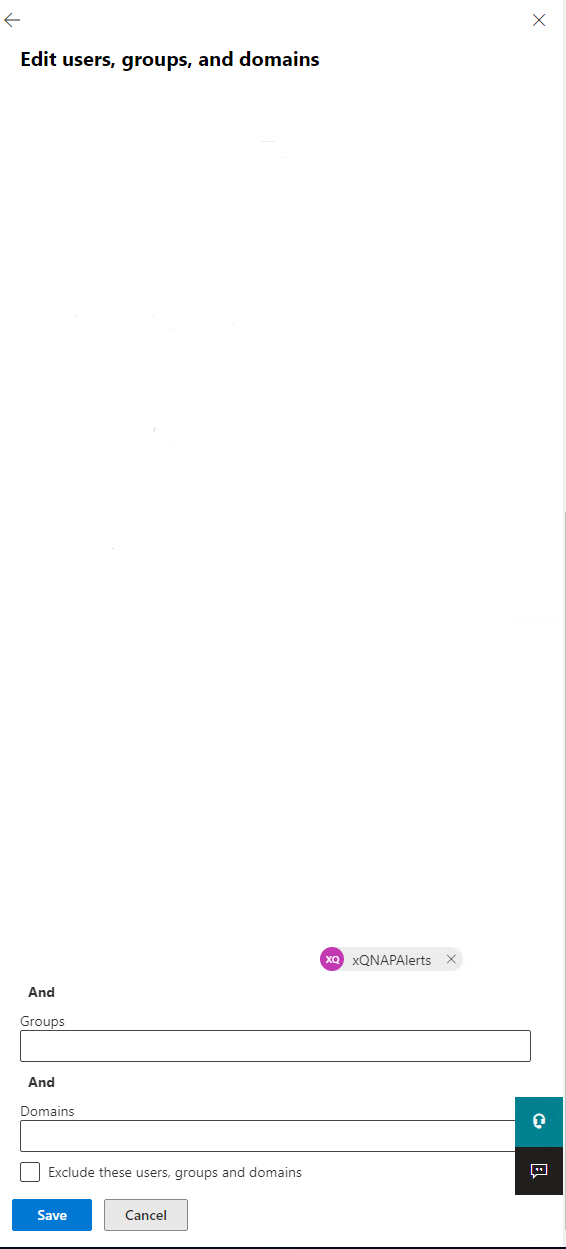 |
|---|
| Edit Users |
- Test your alerts to make sure they work. If they do, a ticket should be generated in ServiceDesk under the category you assigned it.
Teams
Team Missing From Teams Admin Center
Cause:
An attribute on the underlying modern group isn't correctly populated.
Replace {groupid} in the Query for the actual GroupId in question, which you can get via the Exchange Online powershell, with the "Get-UnifiedGroup" cmdlet, as the "ExternalDirectoryObjectId" attribute or by looking the group up within Entra.
1. Access Graph Explorer
2. Sign in to Graph Explorer on the top right-hand side menu:

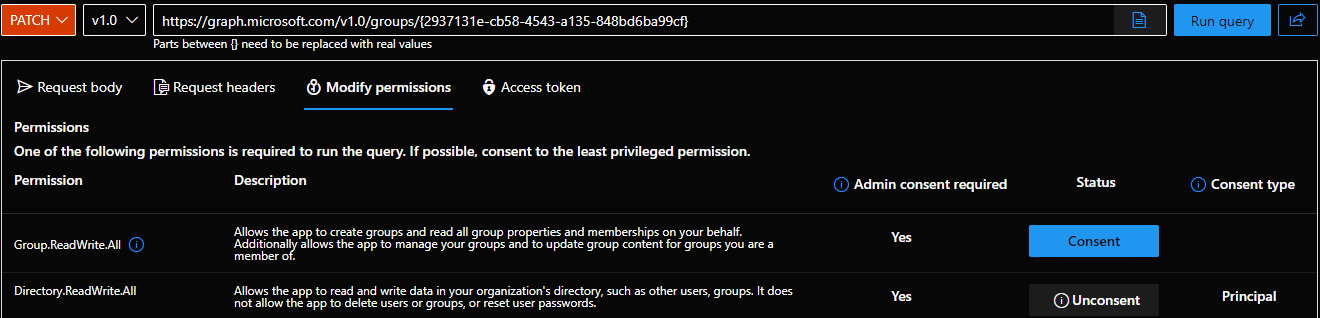
3. Change the query line to: PATCH > v1.0 > https://graph.microsoft.com/v1.0/groups/{groupid}

4. Click the Modify Permissions tab and consent to any permissions required (you do not need to consent for the whole organization).
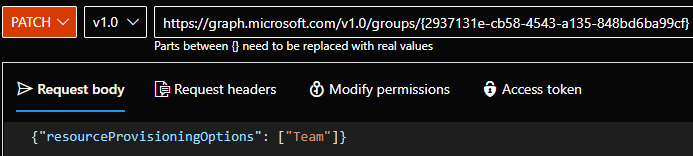
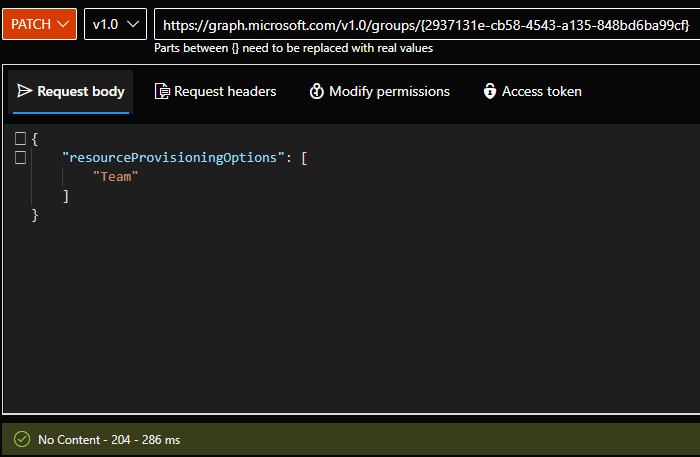
5. Add the following value on the request body: {"resourceProvisioningOptions": ["Team"]}
6. Confirm you receive a 204 response in the middle of the page.
7. Confirm the team appears correctly back on the Skype & Teams Admin Center - Team Overview.
